
Create Your First Website: Start Your First Web Development Project
In the previous lesson, we covered the configuration of Visual Studio Code (VS Code) for working with Astro. We discussed important plugins like Astro and Prettier, enabling AutoSave, and setting the Default Formatter. If you haven't gone through the previous lesson yet, you can catch up here, Configure Visual Studio Code Like a Pro
Now, it's time to create a new Astro project and start building. In this lesson, we will walk you through the process of creating a new Astro project, adding a license, and starting the development server. Let's dive in!
1. Create a folder where you can put code projects
First, create a folder where you can put all your codes. On the PowerShell, type mkdir “name of your folder” then enter
mkdir Developer
The mkdir command is used to create a new directory (also known as a "folder") on your computer.
Next type cd “name of your folder” then enter, to get into your folder
cd Developer
The cd command is used to change the current directory that you are currently working in.
2. Create a new Astro project
To create a new Astro project, type the following command:
yarn create astro
Once prompted, type in your astro project folder name and hit enter. Note: “astro project folder name” is your custom folder name for your astro project.
./course

Then select “empty” by clicking the down arrow in your keyboard then hit enter.

And choose “Yes” to install dependencies and hit enter.

Choose “No” for TypeScript by clicking the right arrow in your keyboard and then hit enter.

Choose “No” for git repository init by clicking the right arrow in your keyboard and then hit enter.

Once the folder is created, type in the command cd "name of your astro project" to go in your astro directory
cd course
and then type the following command to open the project folder in Visual Studio Code.
code .

(*) If the command code . is not opening the Visual Studio code, follow these steps:
- Restart your PowerShell by closing and opening it again.
- Check if you are in your astro project folder, if not, go to your project folder using the cd command
cd Developer/course
- Once you are in your project folder, run the "code ." command again and hit enter, this will now open your Visual Studio Code.
code .
3. Adding License in package.json
Adding a license in the "package.json" file will specify the terms of use for your software. This is important because it helps to protect your intellectual property and ensure that your software is used in a way that you are comfortable with.
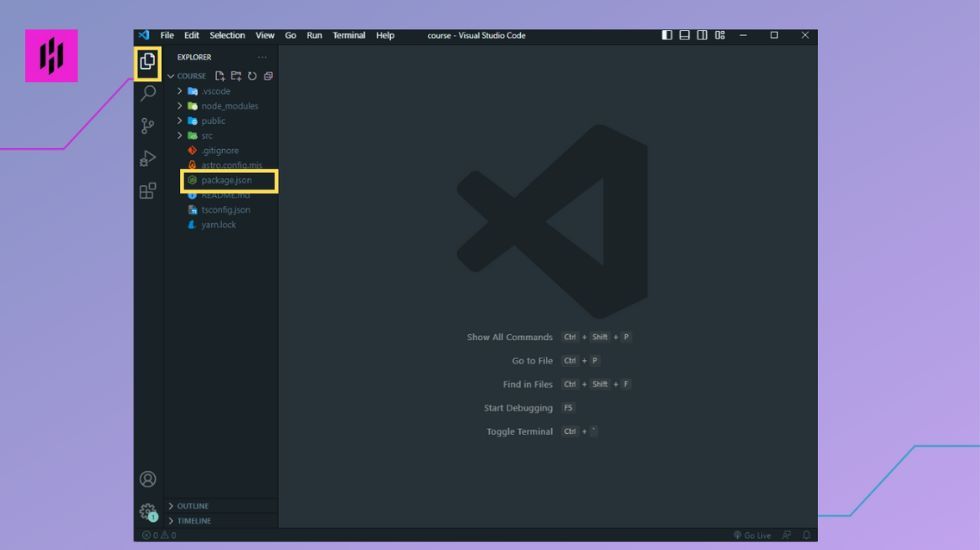
To add it, go back to your project folder by clicking the explorer icon at the left side bar of your Visual Studio Code and select the package.json file.
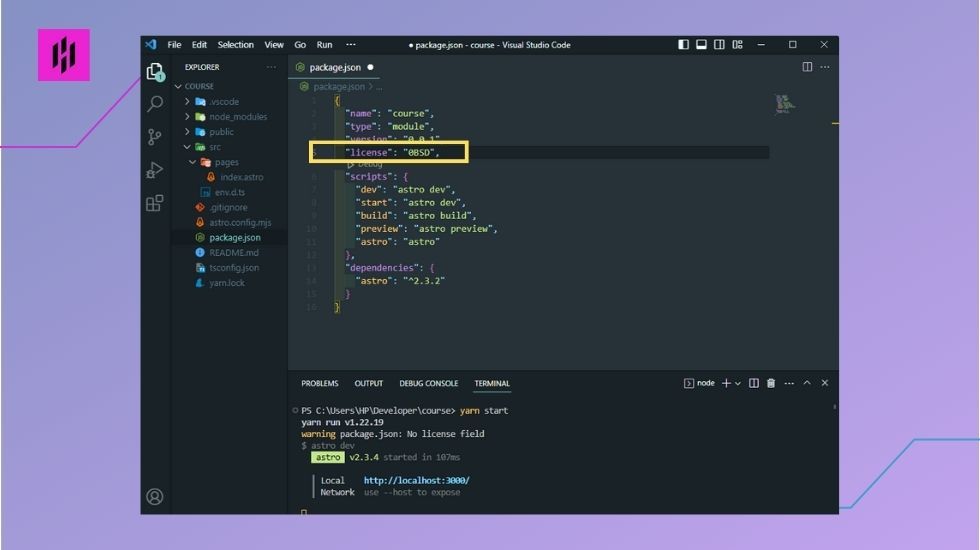
Open the "package.json" file in your project and type the license below, under the version. Check your license requirements as needed.
Sample license:
"license": "0BSD",
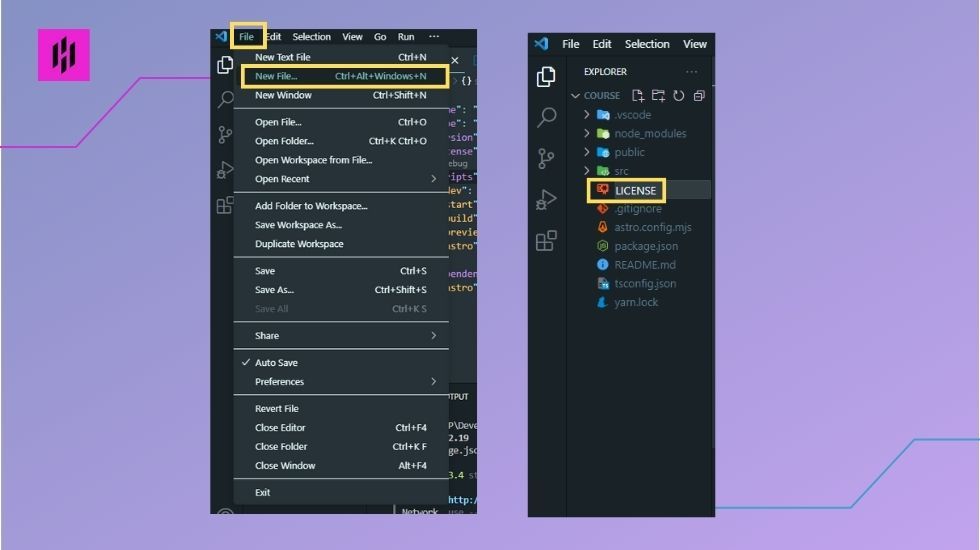
Next is to add a "LICENSE" file in your astro project folder by clicking the File menu at the top bar and choose "New File". Type in "LICENSE" and hit enter.
Once the license file is created, copy the license clause below and paste it in the license file.
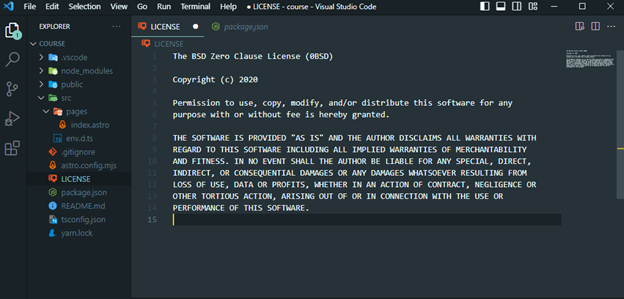
The BSD Zero Clause License (0BSD)

Copyright (c) 2020

Permission to use, copy, modify, and/or distribute this software for any
purpose with or without fee is hereby granted.

THE SOFTWARE IS PROVIDED "AS IS" AND THE AUTHOR DISCLAIMS ALL WARRANTIES WITH
REGARD TO THIS SOFTWARE INCLUDING ALL IMPLIED WARRANTIES OF MERCHANTABILITY
AND FITNESS. IN NO EVENT SHALL THE AUTHOR BE LIABLE FOR ANY SPECIAL, DIRECT,
INDIRECT, OR CONSEQUENTIAL DAMAGES OR ANY DAMAGES WHATSOEVER RESULTING FROM
LOSS OF USE, DATA OR PROFITS, WHETHER IN AN ACTION OF CONTRACT, NEGLIGENCE OR
OTHER TORTIOUS ACTION, ARISING OUT OF OR IN CONNECTION WITH THE USE OR
PERFORMANCE OF THIS SOFTWARE.
10. Start the Development Server
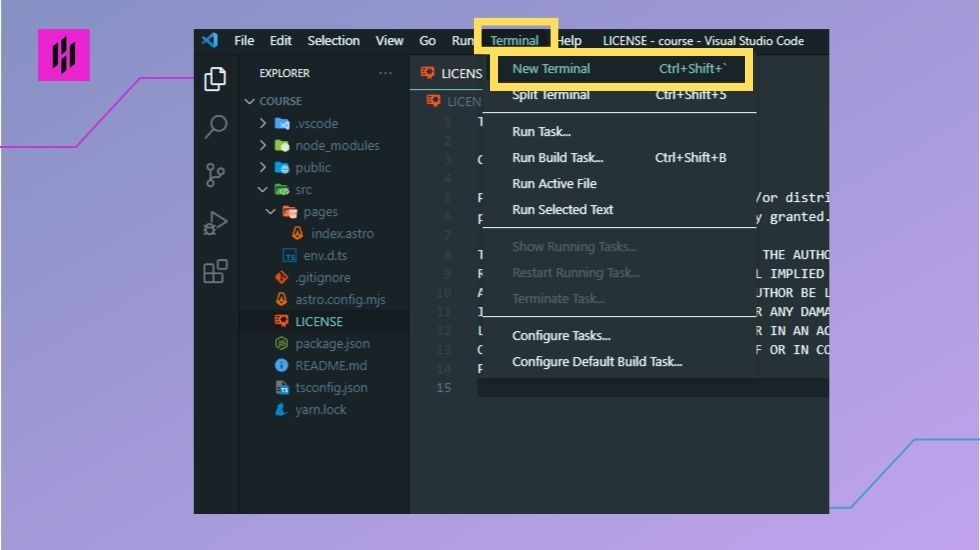
Lastly, to start the development server. Open terminal by clicking the terminal menu at the top bar and select "New Terminal".
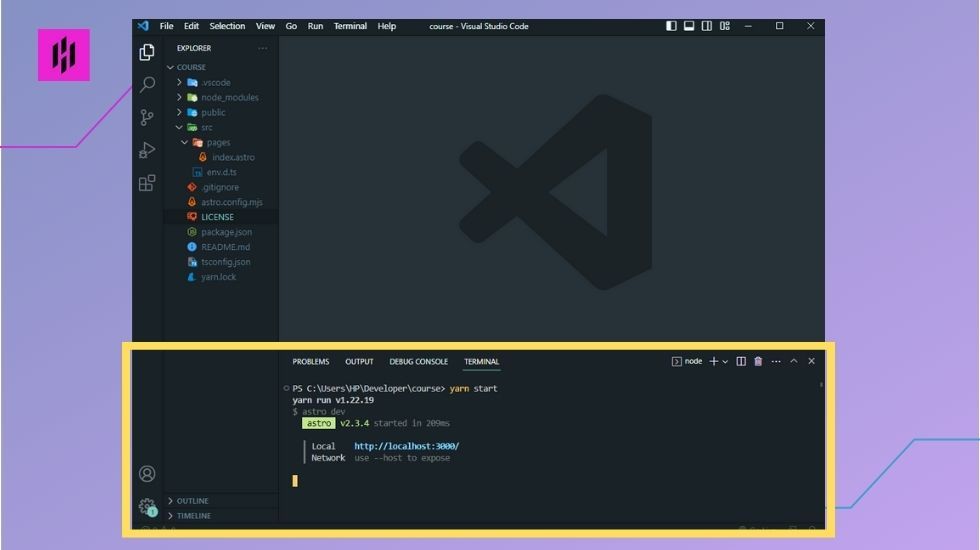
Once the terminal is open, type the following command:
yarn start
This will give you a default link such as http://localhost:3000/ (or a different number, depending on your configuration). As you make changes to your code, the development server will automatically update the browser with the latest changes.
(*) If you encounter the error below, it means you need to change the setting of your execution policy.
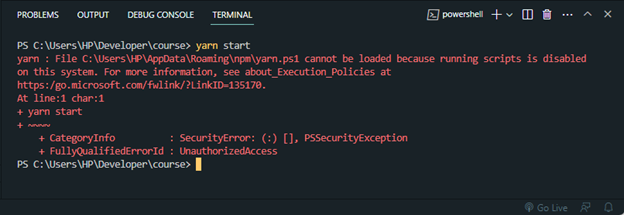
(*)To do this, follow these steps:
- Open PowerShell as an Administrator by searching the PowerShell in your computer then right click on it and choose run as administrator.
- Run the following command:
Set-ExecutionPolicy RemoteSigned
-
When prompted, type “Y” to confirm the change.

-
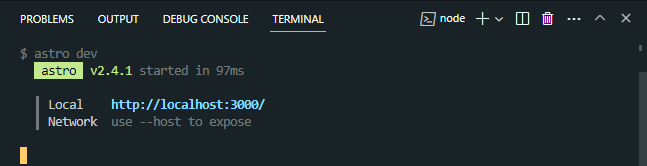
After changing, go back to your Visual Studio Code and try running "yarn start" again in its terminal. It should work now.
yarn start
Next Step
Congratulations on setting up your basic Astro project! In this lesson, we covered the essential steps to create a new Astro project, add a license, and start the development server. You now have a solid foundation to begin building your Astro application.
In the next lessons, we will explore two important next steps, you can choose from starting to create a new page or creating a default layout. These options will allow you to further customize and structure your Astro project according to your specific needs. Stay tuned for the next lessons, where we will dive into these topics.
To continue with the next lesson, "Add Page to Your Website", please follow this link: Add Page to Your Website
To continue with the next lesson "Create a layout for your website", please follow this link: Create a layout for your website