
Create a layout for your website
Welcome back to our web development journey! In the previous lesson, we learned about creating a new page, setting up metadata, and updating the Home and About pages. If you haven't gone through the previous lesson yet, you can catch up on this link Add page to Your Website
Today, we will delve into our next lesson, where we will learn about the significance of creating a layout for our website and how to implement it using Astro. Let's get started!
1. Creating the Layout
When it comes to web development, it's crucial to ensure that your website not only functions flawlessly but also looks professional and is easy to navigate. A well-designed website with a consistent layout can greatly enhance the user experience and make your content more accessible. This is where creating a layout comes into play.
To begin, we need to create a layout component that will serve as the foundation for our website's design. By having a dedicated layout file, we can minimize code duplication and make our website more maintainable. Any changes or updates we make to the layout will automatically apply to all pages that utilize it.
Let's start by creating the necessary folders and files for our layout component:
-
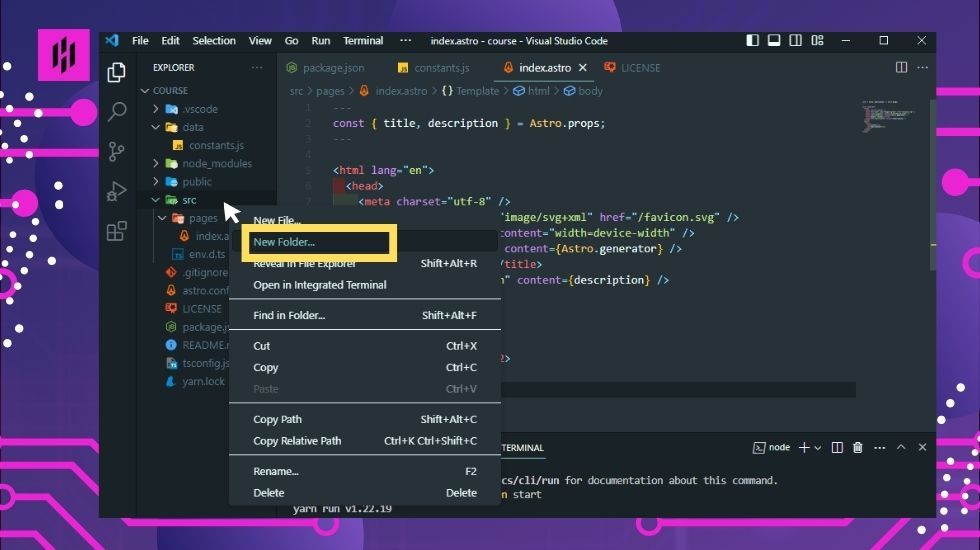
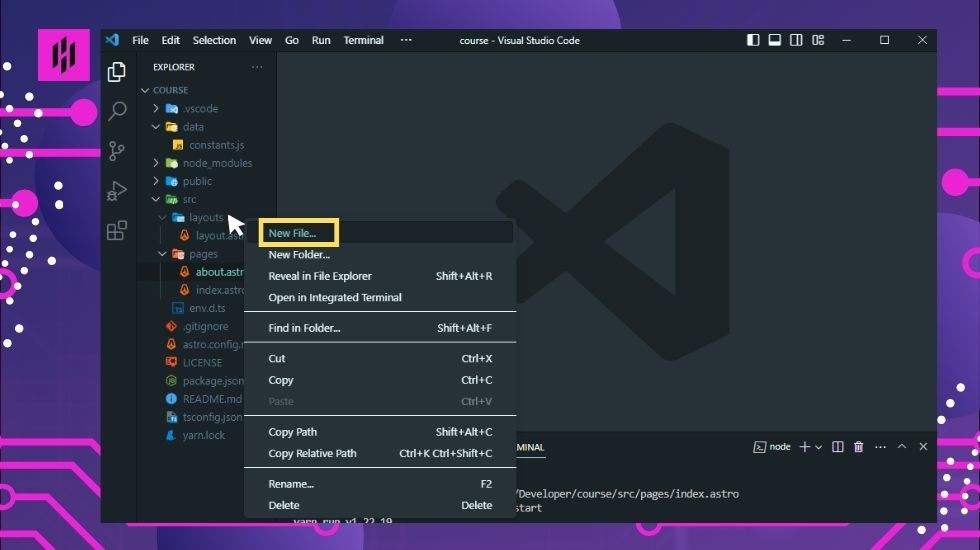
To create the layout folder, navigate to the "src" folder of your Astro project by pointing your mouse to the "src" folder then right click and select "New Folder"
-
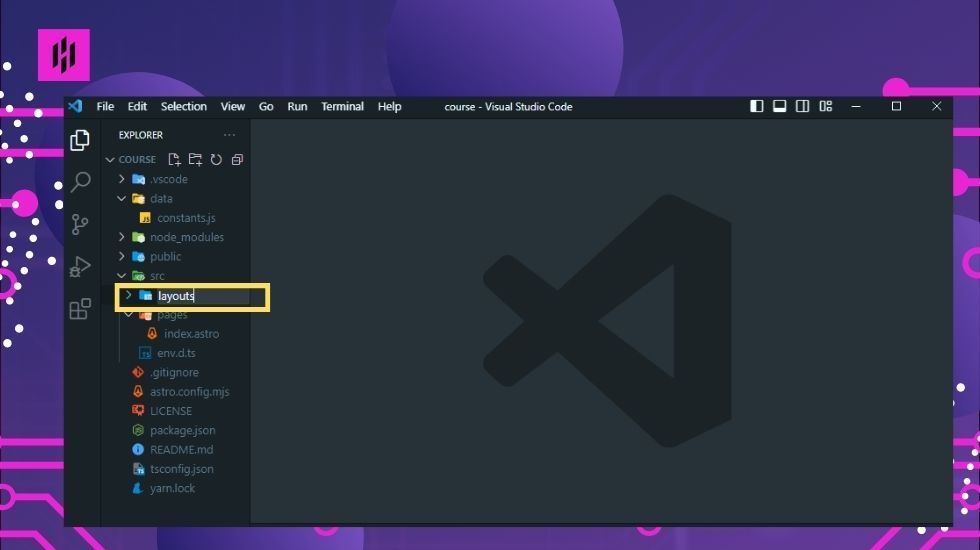
Then, create a new folder called “layouts”.
-
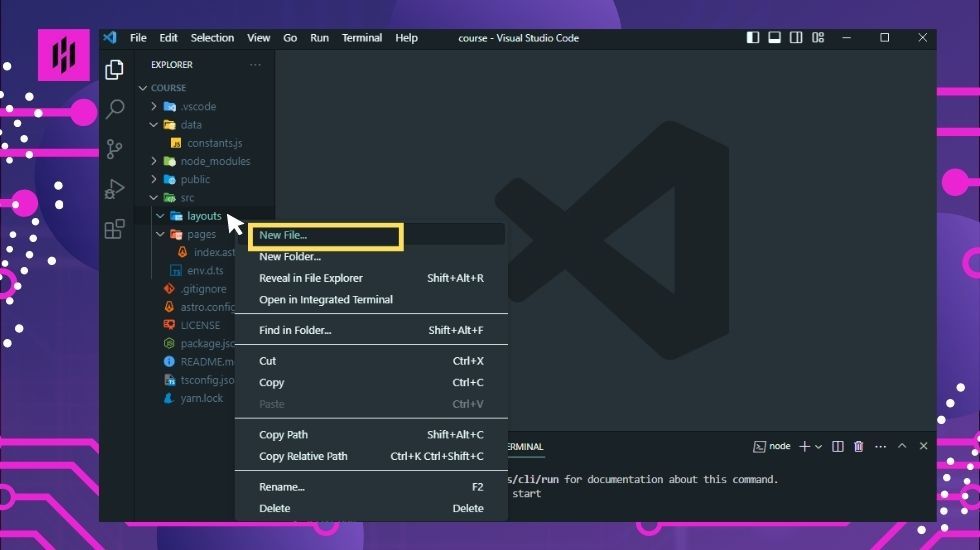
Inside the layouts folder, create a file called “layout.astro” by pointing your mouse in the layout folder then right click and select "New File"
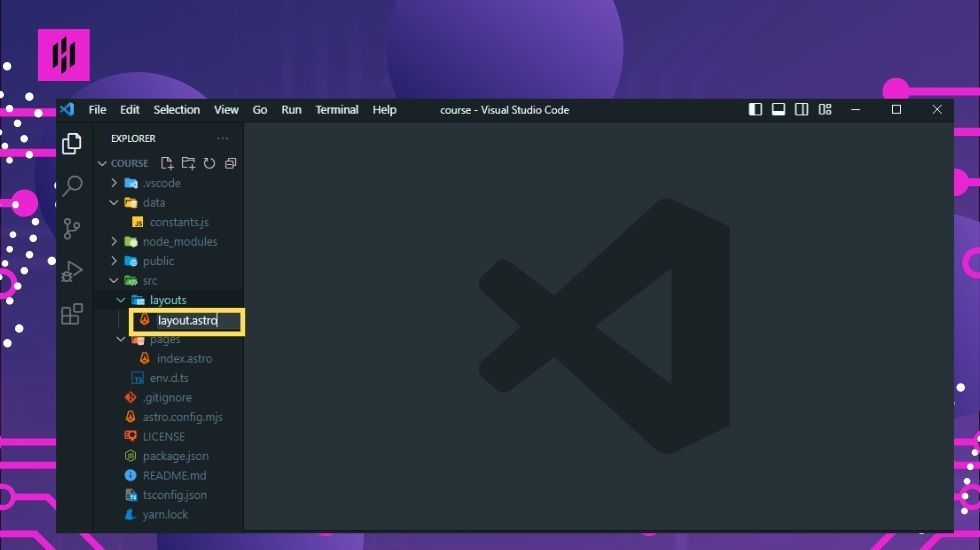
Then type in "layout.astro".
-
Now, open the "layout.astro" file and copy the codes from the "index.astro" file into it. This will ensure that our layout file contains the necessary structure and content.
-
Erase the following code from "layout.astro":
import { pages } from "../../data/constants";

const {
  home: { title, description },
} = pages;
- The layout component will receive properties from pages. To read the property variables, we use:
const { title, description } = Astro.props;
This new code ensures that the layout file can access the title and description dynamically, allowing it to be used across multiple pages.
Here's the updated code in "layout.astro":
---
const { title, description } = Astro.props;
---

<html lang="en">
  <head>
    <meta charset="utf-8" />
    <link rel="icon" type="image/svg+xml" href="/favicon.svg" />
    <meta name="viewport" content="width=device-width" />
    <meta name="generator" content={Astro.generator} />
    <title>Astro: {title}</title>
    <meta name="description" content={description} />
  </head>
  <body>
    <main>
      <h1>{title}</h1>
      <h2>{description}</h2>
    </main>
  </body>
</html>
By creating a layout file, we can reduce code duplication and ensure consistency throughout our website. If any changes need to be made to the layout, we can update it in one place, and the changes will apply to all pages that use the layout file.
Now that we have our layout file, let’s proceed to the next step.
2. Adding the Header with Navbar
To enhance the user experience and provide a consistent navigation experience, we will add a header and footer to our website. The header will typically contain a navigation menu, while the footer will display important information such as copyright notices and contact details.
Let's start with adding the header.
To add a header, create a new file in the "layouts" folder named "header.astro". This file will hold the code for our header component.
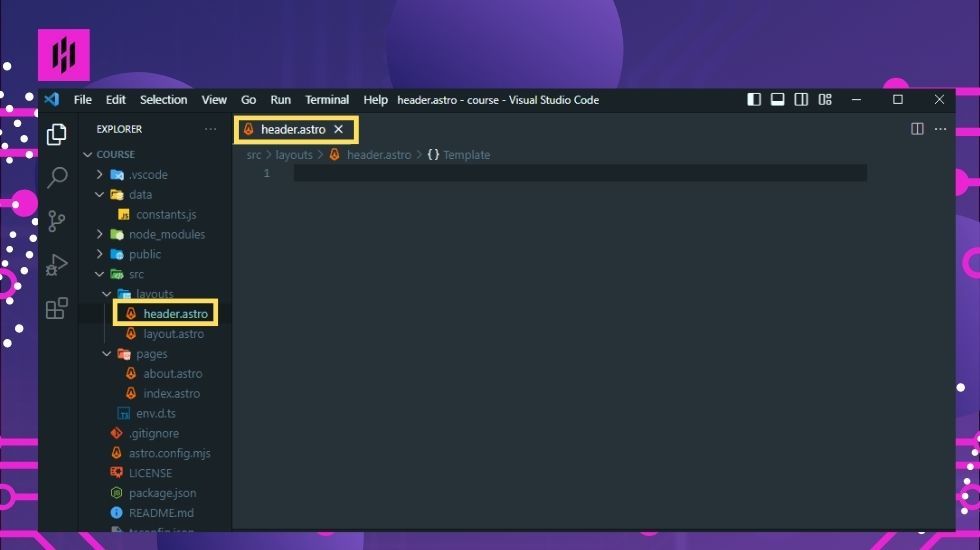
Now, open the "header.astro" file and add the following code:
<header>
  <nav>
    <ul>
      <li>
        <a href="/">Home</a>
      </li>
      <li>
        <a href="/about">About</a>
      </li>
    </ul>
  </nav>
</header>
In this code, we have created a header element and added a nav element inside it. Inside the nav element, we have added an unordered list with two list items representing the links to the home and about pages.
To include the header component in our layout, open the "layout.astro" file. Import the "Header" component at the top of the file by adding the following code within the lines "---":
import Header from "./header.astro";
Next, insert the <Header /> component within the "body" section of the file. This will ensure that the header appears on every page that uses this layout.
This is how it would look like:
---
import Header from "./header.astro";

const { title, description } = Astro.props;
---

<html lang="en">
  <head>
    <meta charset="utf-8" />
    <link rel="icon" type="image/svg+xml" href="/favicon.svg" />
    <meta name="viewport" content="width=device-width" />
    <meta name="generator" content={Astro.generator} />
    <title>Astro: {title}</title>
    <meta name="description" content={description} />
  </head>
  <body>
		<Header />
    <main>
      <h1>{title}</h1>
      <h2>{description}</h2>
    </main>
  </body>
</html>
By adding the "Header" component, you will now have a consistent header and navigation bar across all your pages, which can improve user experience and website design.
3. Adding the Footer
The footer is an important element in a website that appears at the bottom of every page. It provides important information such as copyright notices, legal disclaimers, contact information, and links to other relevant pages. Let's add a footer to our website to complete its design.
To add a footer, we will create a new file named "footer.astro" inside the layouts folder.
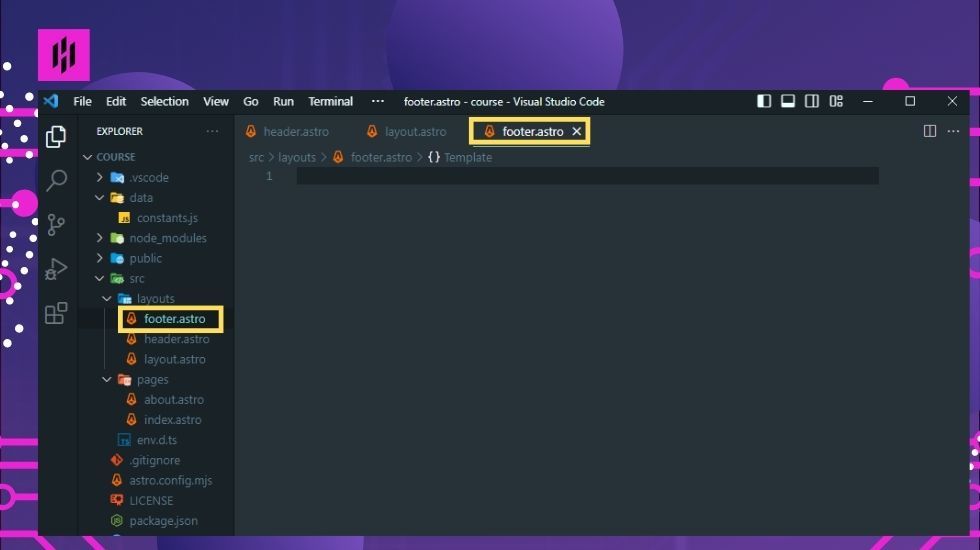
Open the "footer.astro" and add the following code:
<footer> <p>© {new Date().getFullYear()} . All Rights Reserved.</p> </footer>
This code creates a simple footer element that contains a copyright notice and the current year.
To include the footer compnent in our layout, go back to the "layout.astro" file. Import the "Footer" component by adding the following code at the top, below the header import:
import Footer from "./footer.astro";
Next, add the <Footer /> component in the "body" section of the file. This will ensure that the footer appears at the bottom of every page that uses this layout.
This is how it would look like in the layout.astro file.
---
import Header from "./header.astro";
import Footer from "./footer.astro";

const { title, description } = Astro.props;
---

<html lang="en">
  <head>
    <meta charset="utf-8" />
    <link rel="icon" type="image/svg+xml" href="/favicon.svg" />
    <meta name="viewport" content="width=device-width" />
    <meta name="generator" content={Astro.generator} />
    <title>Astro: {title}</title>
    <meta name="description" content={description} />
  </head>
  <body>
		<Header />
    <main>
      <h1>{title}</h1>
      <h2>{description}</h2>
    </main>
		<Footer />
  </body>
</html>
With the addition of the footer, we have provided important information to our users and completed the design of our website.
4. Add the Slot in the layout.astro file
In Astro, the slot is a special element that allows you to inject content into a component from the page components that use it. It acts as a placeholder for specific content.
To add the slot to the "layout.astro" file, open the file and locate the place where you want the specific content appear. Typically, this will be inside the "main" element.
For example, we can put the <slot /> element within the "main" tag, below the "h2". This is how the code would look like:
---
import Header from "./header.astro";
import Footer from "./footer.astro";

const { title, description } = Astro.props;
---

<html lang="en">
  <head>
    <meta charset="utf-8" />
    <link rel="icon" type="image/svg+xml" href="/favicon.svg" />
    <meta name="viewport" content="width=device-width" />
    <meta name="generator" content={Astro.generator} />
    <title>Astro: {title}</title>
    <meta name="description" content={description} />
  </head>
  <body>
		<Header />
    <main>
      <h1>{title}</h1>
      <h2>{description}</h2>
			<slot />
    </main>
		<Footer />
  </body>
</html>
By adding the <slot /> tag, you create a placeholder where the content from the parent component will be inserted.
5. Set the Layout for the Home and About Page
To set the layout for the Home and About pages, you need to include the props and < Layout > component in each respective page component.
Let's start with the Home page. Open the Home page component file (usually named "index.astro").
Add the following import statement at the top of the file, below any existing import statements:
import Layout from "../layouts/layout.astro";
import { pages } from "../../data/constants";
The "Layout" component is imported from the "layout.astro" file, and the "pages" object is imported from the "constants.js" file located in the "data" folder. The "pages" object contains the title and description for each page.
Next, within the lines "---", destructure the "title" and "description" properties from the "pages.home" object, like this:
const {
  home: { title, description },
} = pages;
This destructing assignment extracts the "title" and "descrption" properties from the "pages.home" object.
Finally, wrap the content of the Home page component with the "< Layout >" component, passing the "title" and "description" as props. You can also add the desired content within the "< p >" tags, like this:
<Layout title={title} description={description}>
  <p>Your content goes here</p>
</Layout>
This structure ensures that the content of the Home page is rendered within the layout defined in the "layout.astro" file.
This is how the updated code should look like in the index.astro file:
---
import Layout from "../layouts/layout.astro";
import { pages } from "../../data/constants";

const {
  home: { title, description },
} = pages;
---

<Layout title={title} description={description}>
  <p>Your content goes here</p>
</Layout>
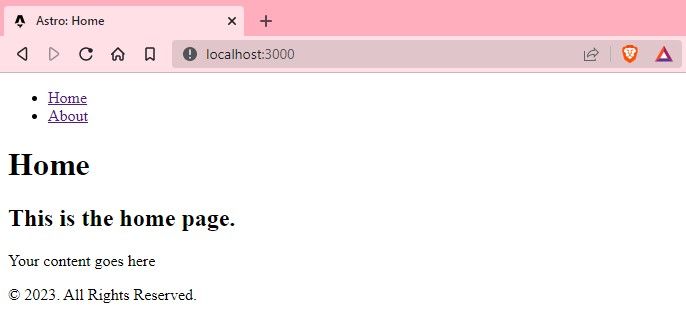
This is how the homepage output would look like in your developer server:
Next, repeat the same steps for the About page component. Open the about.astro file and add the same import statements for "Layout" and "pages":
import Layout from "../layouts/layout.astro";
import { pages } from "../../data/constants";
Within the lines "---", destructure the "title" and "description" properties from the "pages.about" object, and wrap the content of the About page component with the "< Layout >" component, passing the "title" and "description" as props:
---
import Layout from "../layouts/layout.astro";
import { pages } from "../../data/constants";

const {
  about: { title, description },
} = pages;
---

<Layout title={title} description={description}>
  <p>Your content goes here</p>
</Layout>
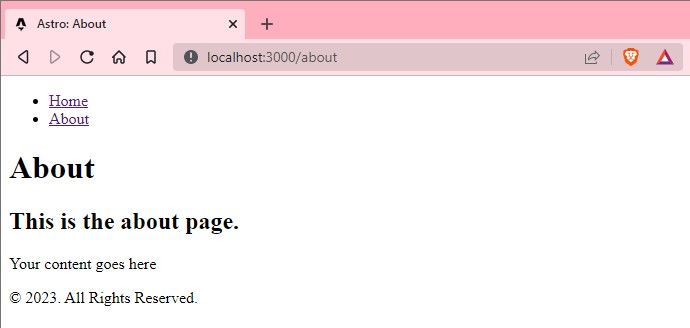
This is how the about page output would look like in your developer server:
Exercise: Add a Contact page with the website layout
Now is your turn to add a contact page. In this exercise, you need to create a contact page with the website layout. A contact page is important because it allows visitors to easily get in touch with you. Here are some few tips to finish this exercise:
- Create new file called “contact.astro” inside the pages folder
- Add the contents from index.astro or about.astro and replace some of the code with contact
- Add the meta data in the constants.js file
- Add the contact page to the header
Once you’ve successfully added your contact page, upload it to our discord channel developer in this link https://discord.com/invite/daEPHqwA8d to show off what you’ve done.
Next Step
Congratulations on creating a layout for your website! You now have a consistent design with a header and footer that will be displayed across all pages. Your website is starting to take shape.
In the next lesson, "Style your Website with Tailwind CSS," we will explore the power of Tailwind CSS to style our website. Tailwind CSS is a highly customizable CSS framework that allows us to apply styles using utility classes. We will learn how to install Tailwind CSS and use it to style, making our website visually appealing. Get ready to take your website to the next level!
Click Style your Website with Tailwind CSS to jump into the next lesson.
Remember to share your completed Contact page on our Discord channel for developers. It's a great way to show off your progress and get valuable feedback from the community. Keep up the fantastic work!