
Style your Website with Tailwind CSS
Welcome back to our web development series! In the previous lesson, we covered the process of creating a layout for your website, including adding a header and footer, setting the layout for specific pages, and incorporating props and slots. Building upon that foundation, we now venture into our next lesson, where we will explore the styles on your website with Tailwind CSS. If you haven't gone through the previous lesson yet, you can catch up on this link Create a layout for your Website
Tailwind CSS is a highly popular utility-first CSS framework that provides a wide range of pre-defined styles and utility classes. This framework empowers developers to create visually appealing designs while maintaining flexibility and customization options.
In this chapter, we will cover the following topics:
-
Install Tailwind CSS: We will walk you through the installation process of Tailwind CSS, ensuring you have the necessary setup to get started.
-
Style your H1 and H2: We will demonstrate how to apply Tailwind CSS utility classes to style your heading elements.
-
Set text color: Learn how to set the text color of your HTML elements using Tailwind CSS.
-
Set text size: Discover how to adjust the text size of your content using Tailwind CSS utility classes.
-
Set margin: Explore the various margin utility classes provided by Tailwind CSS, allowing you to control the spacing around your elements.
By the end of this chapter, you will have a solid understanding of how to leverage Tailwind CSS to style your website and create visually appealing designs.
Now, let's dive into each topic and start enhancing the style of our website!
1. Install Tailwind CSS
To begin using Tailwind CSS, we need to install it into our project. Here are the steps to follow:
-
Visit the official Tailwind CSS website at https://tailwindcss.com to familiarize yourself with its features and benefits. Note that the installation guide we use for this lesson is from the official Astro website, the framework we are using. It is always recommended to refer to the official installation guides or reputable sources to ensure you have the most-up-to-date instructions.
-
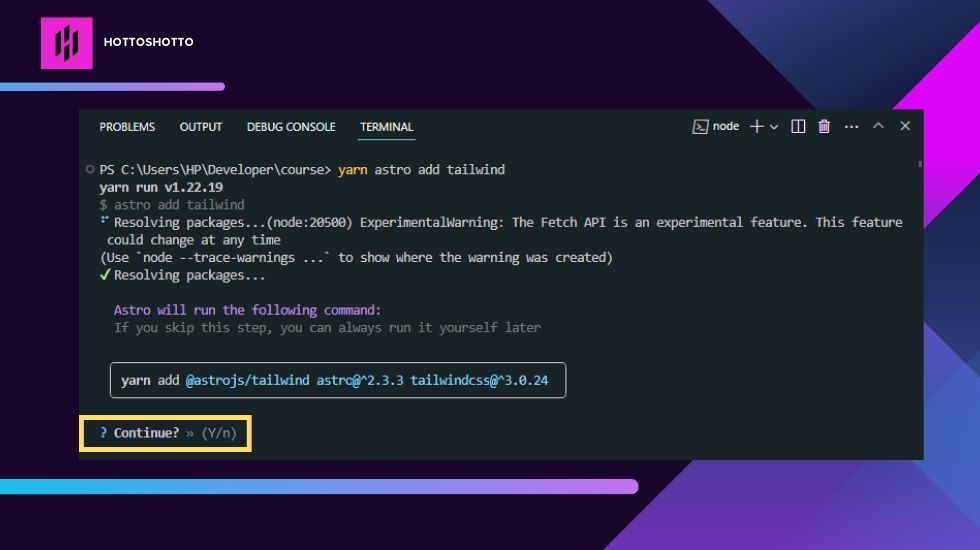
To install tailwind using yarn, navigate to your Astro project and open the terminal of your Visual Studio Code, execute the following command:
yarn astro add tailwind
-
If there are any running processes in the terminal, make sure to terminate them by pressing Ctrl+C if necessary.
-
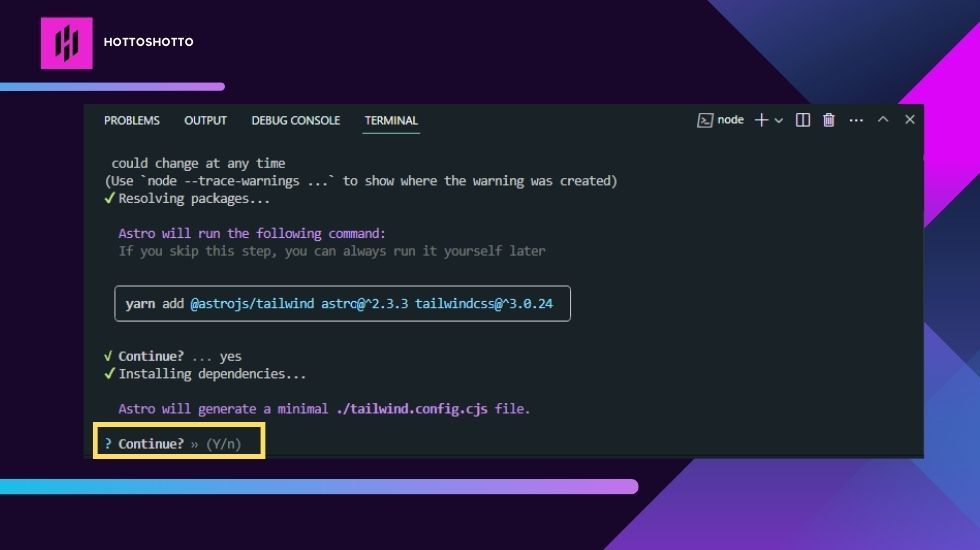
When prompted, choose “Yes” by pressing the ‘Y’ key on your keyboard to confirm the installation of dependencies.
-
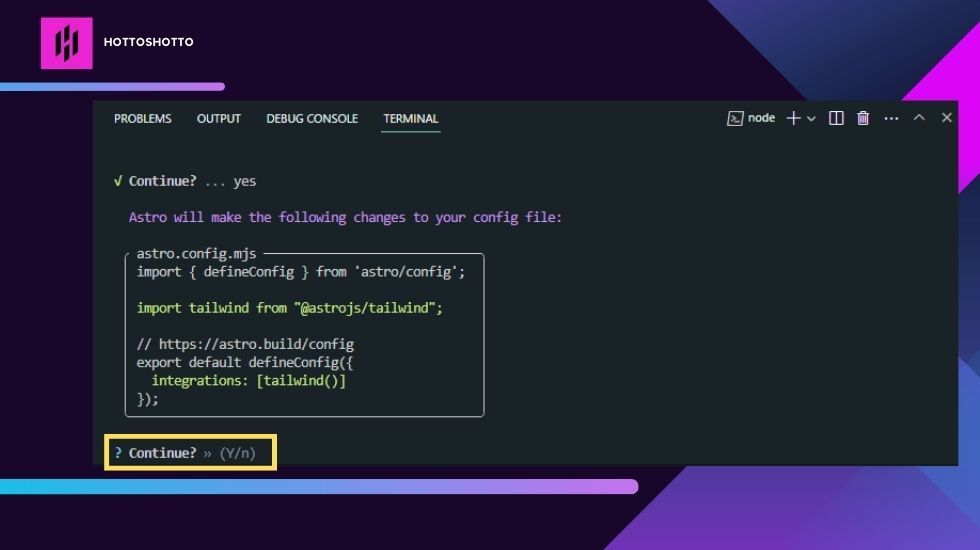
The installation process may prompt you to generate a minimal Tailwindcss configuration file and make changes to your project. Confirm these prompts by selecting “Y” to ensure a smooth installation process.
-
Once the installation process is complete, you will receive a confirmation message indicating that Tailwindcss has been successfully installed in your Astro project.
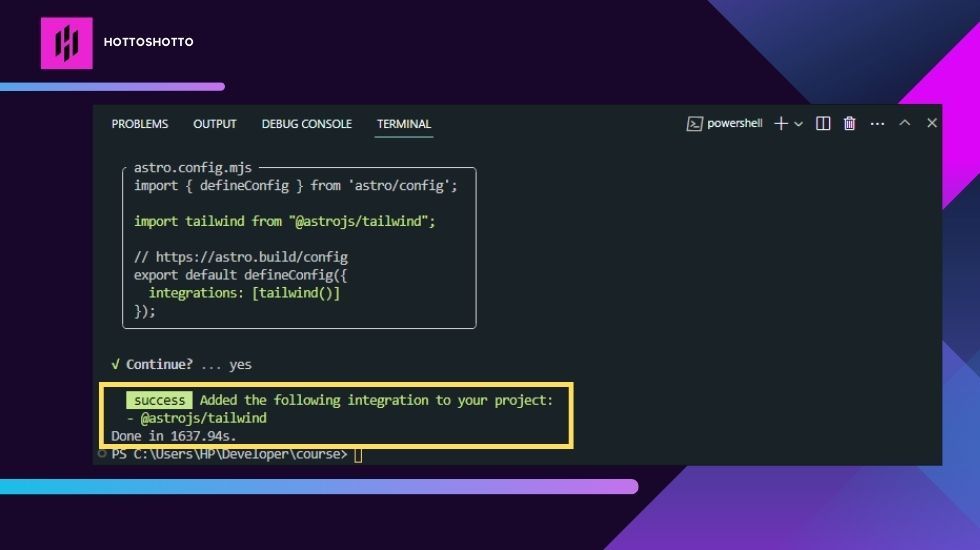
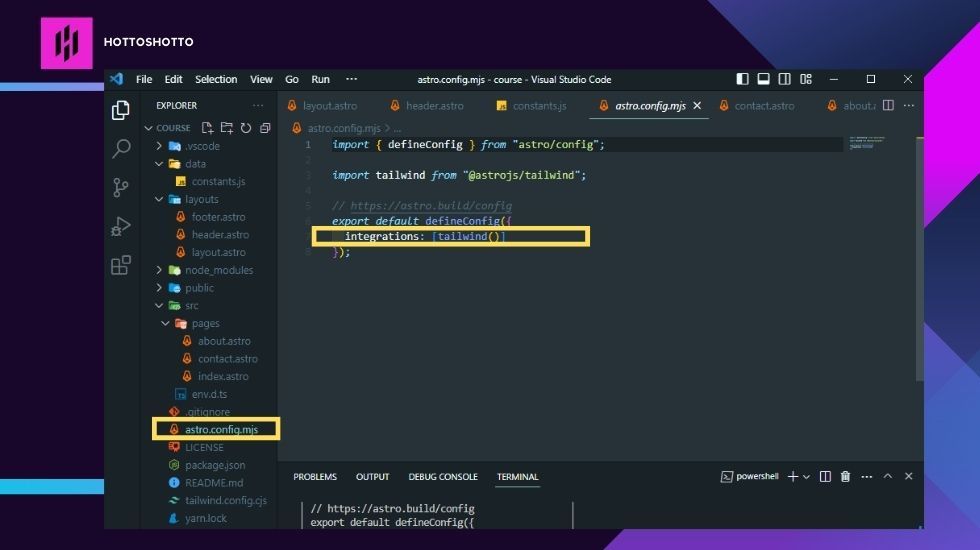
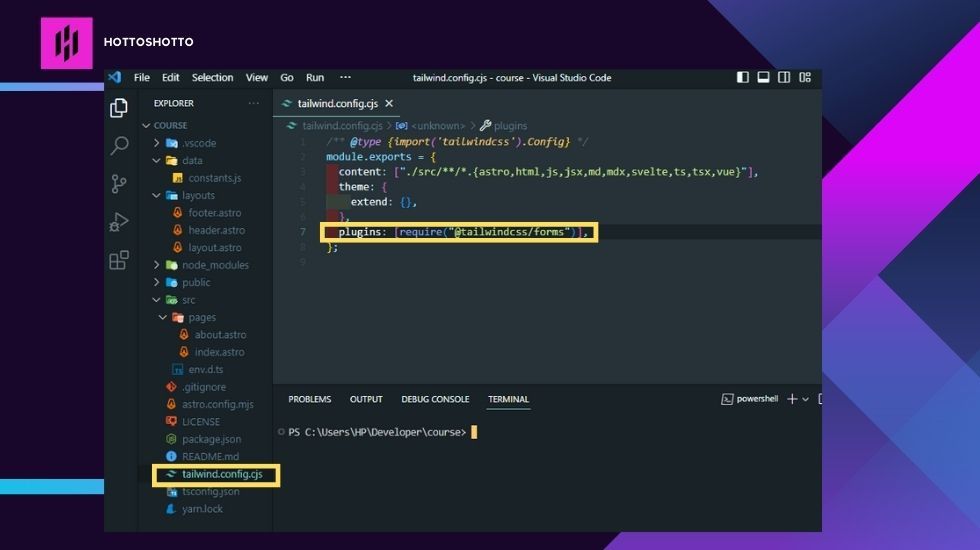
After the installation, you will notice the following changes in your project:
-
In package.json, you can see that astro tailwind has been added.

-
The Astro configuration will reflect the integration of Tailwindcss into your project.
-
And we also have a tailwind configuration file which tells tailwind how to behave in the project.
One of the notable advantages of using Astro is its easy integration with various components, including Tailwindcss, React, and others. Astro provides default settings that enable developers to quickly get started.
2. Add styling classes to your components
To demonstrate the usage of Tailwind CSS in your Astro project, we will apply it to the H1 and H2 elements in your layout file, you can follow these steps:
- Open the layout file and locate the H1 and H2 elements
- Add the following Tailwind CSS utility classes to the H1 element:
class="my-5 ml-5 text-2xl text-red-500"
- Add the following Tailwind CSS utility classes to the H2 element:
class="my-3 ml-3 text-lg text-blue-400"
- Save the changes in your layout file.
This is how the codes should look like:
<h1 class="my-5 ml-5 text-2xl text-red-500">{title}</h1>
<h2 class="my-3 ml-3 text-lg text-blue-400">{description}</h2>
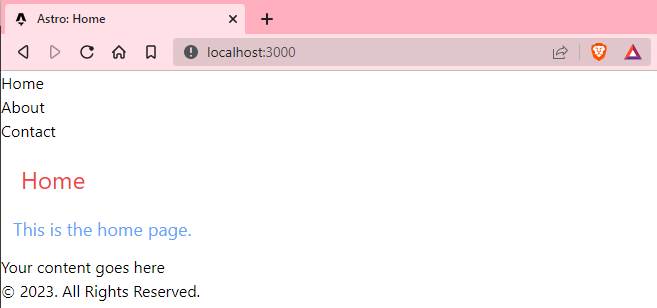
Upon running your development server, you should see the output reflecting the applied Tailwind CSS styles on the H1 and H2 elements as defined in the example.
Set Text Color, Size, and Margin
Understanding how to set text color, size, and margin using Tailwind CSS is crucial for creating visually appealing and well-designed websites. Here's why it's important:
-
Text color: By setting the text color, you can create contrast, highlight important information, and enhance the overall visual appeal of your content.
-
Text size: Text size helps in improving readability and hierarchy within your design. By adjusting the size of the text, you can draw attention to key elements or establish a consistent visual hierarchy across your website.
-
Margin: Margin provides spacing and separation between elements, allowing you to control the overall layout and spacing of your content. Proper use of margin ensures that elements are visually balanced and organized.
Let's take a look at a few examples we have below:
Set Text Color
Tailwind CSS provides utility classes to set the text color. By applying these classes, you can easily customize the color of your text. Here's an example:
<p class="text-red-500">Your content goes here</p>
In the above example, the text-red-500 class is applied to the < p > element of the index.astro file, setting its text color to red.
Here's a preview of the output:
Set Text Size
Tailwind CSS also offers utility classes to set the text size. You can quickly adjust the size of your text using these classes. Here's an example:
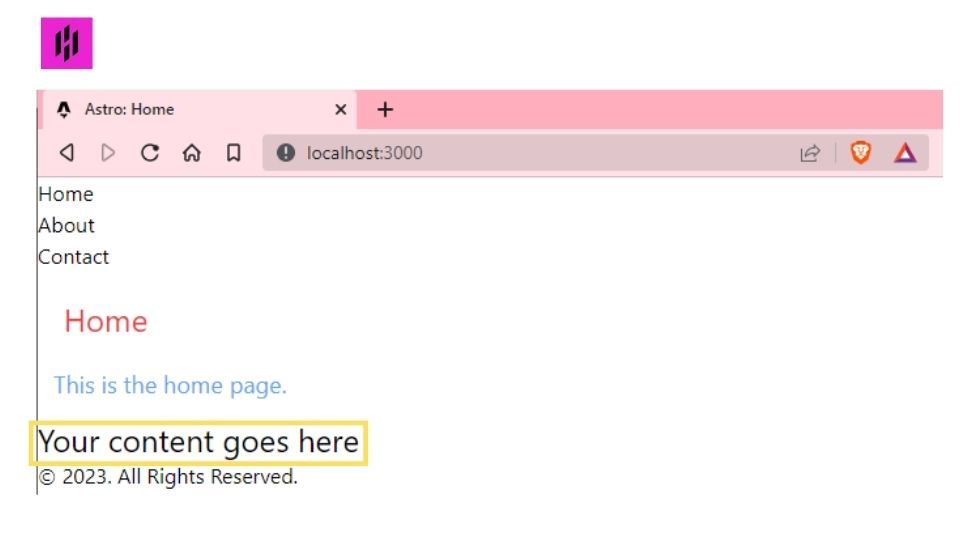
<p class="text-2xl">Your content goes here</p>
In the example above, the text-lg class is applied to the < p > element, making its text appear larger.
Here's a preview of the output:
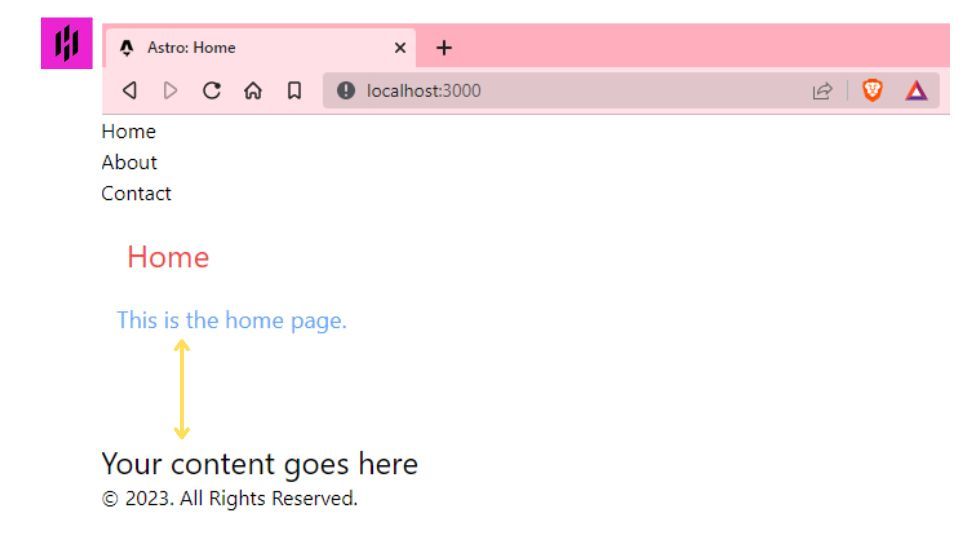
Set Margin
Tailwind CSS provides utility classes to set margins around elements. With these classes, you can easily add spacing between elements or adjust the margin of an element. Here's an example:
<div class="mt-4">
  <p>Your content goes here</p>
</div>
In the example, the "mt-4" class is applied to the < div > element, adding a top margin of 4 units to the contained < p > element.
Here's a preview of the output:
By utilizing Tailwind CSS's utility classes for text color, size, and margin, you can easily achieve the desired styling effects without writing custom CSS from scratch. This saves development time and promotes consistency throughout your project.
Next Step
In this chapter, we discussed the importance of Tailwind CSS as a utility-first CSS framework and its ability to provide ready-to-use styles and utility classes. We walked through the installation process and learned how to integrate Tailwind CSS into an Astro project. Additionally, we explored applying Tailwind CSS styles to headings in a layout file. This sets the stage for the next chapter, where we will dive into adding an icon library to enhance our website's navigation menu.
Continue your learning journey with our next lesson: Add React to Astro Project. We will explore how to install the Astro icon library and add icons to the navigation menu. Stay excited, and let's take our website development skills to new heights!
Click here to proceed to the next lesson: Add React to Astro Project