Configure Visual Studio Code Like a Pro Web Developer
In the previous lesson, we covered the essential software installation for web development, including Node, Yarn, Git, and Visual Studio Code. Now, building upon that knowledge, we delve deeper into the realm of Visual Studio Code configuration. In this lesson, we will explore how to set up Astro, a powerful plugin for building static websites, and leverage Prettier to ensure consistent code formatting. If you haven't gone through the previous lesson yet, you can catch up here, Start Learning Web Development Today.
Let's dive into the world of Visual Studio Code customization to enhance our web development workflow.
1. Must-have Plugins for Visual Studio Code
Once Visual Studio Code is open, install the Astro extension. From the left sidebar, select the Extensions icon, type “Astro” in the search bar and press Enter. The Astro extension should show up in the search result. Click on the install button to add the extension.
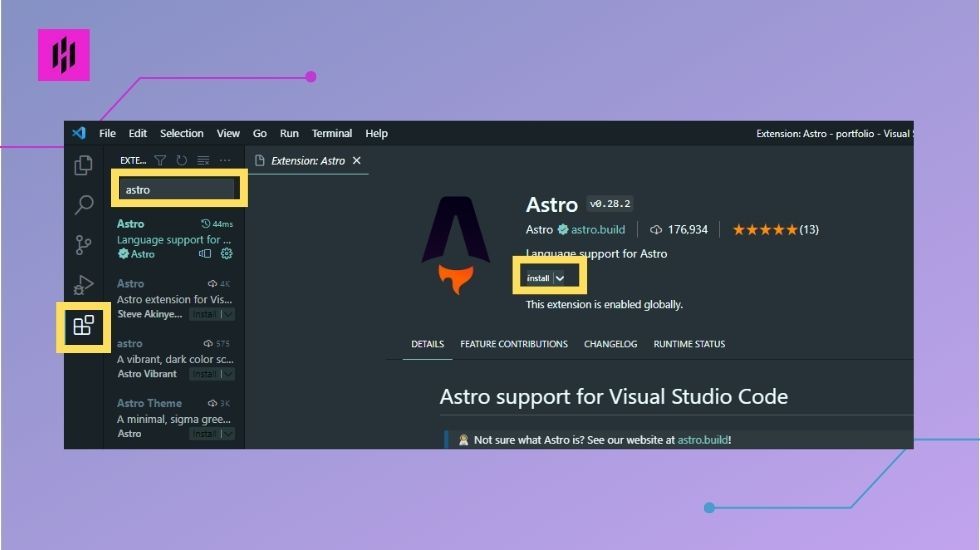
2. Installing Extension and Setting Up Auto Save in Visual Studio Code
To install ‘Prettier’, type in “Prettier” in the search bar and then click the Install button. You can select it also as your default formatter and set format on save.
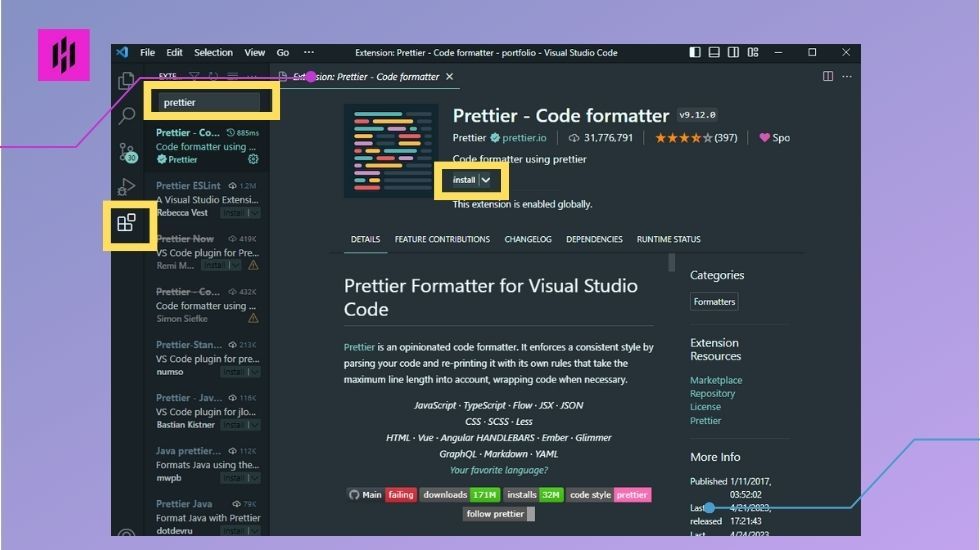
Setting Up Default Formatter to Prettier
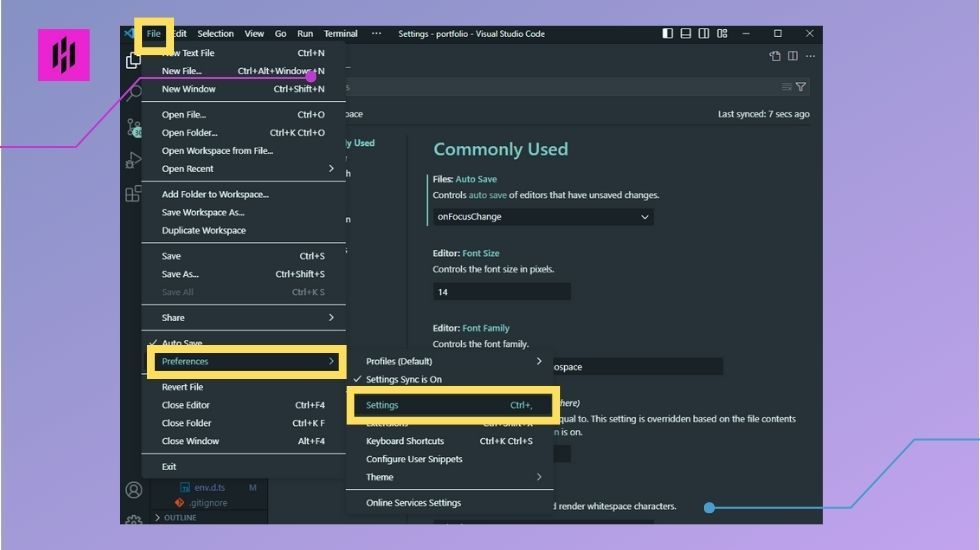
To set up Prettier as your default formatter, open the Preferences pane by clicking the File menu in the top of the page and then click preferences, then settings.
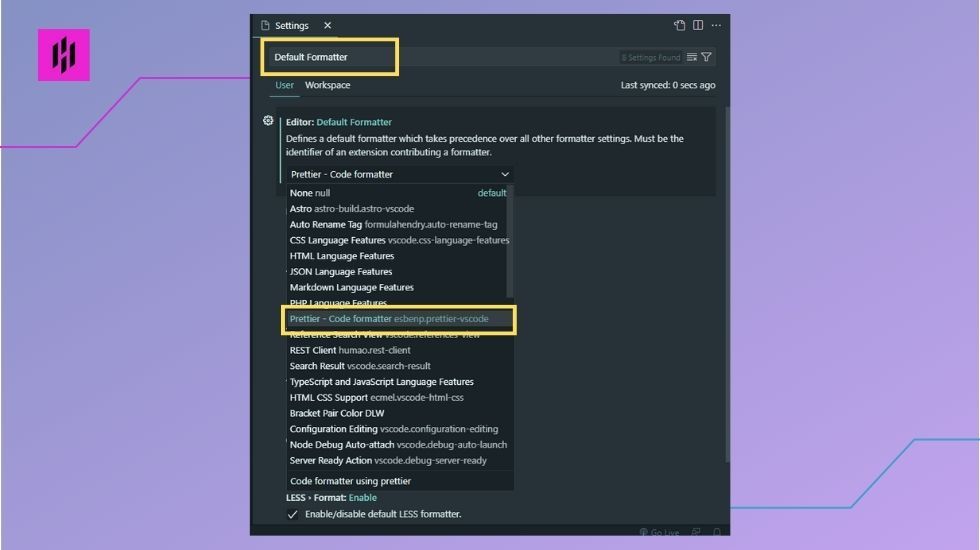
Once you are in the Setting, type Default Formatter in the search bar and select Prettier - Code formatter.
Setting Up Autosave
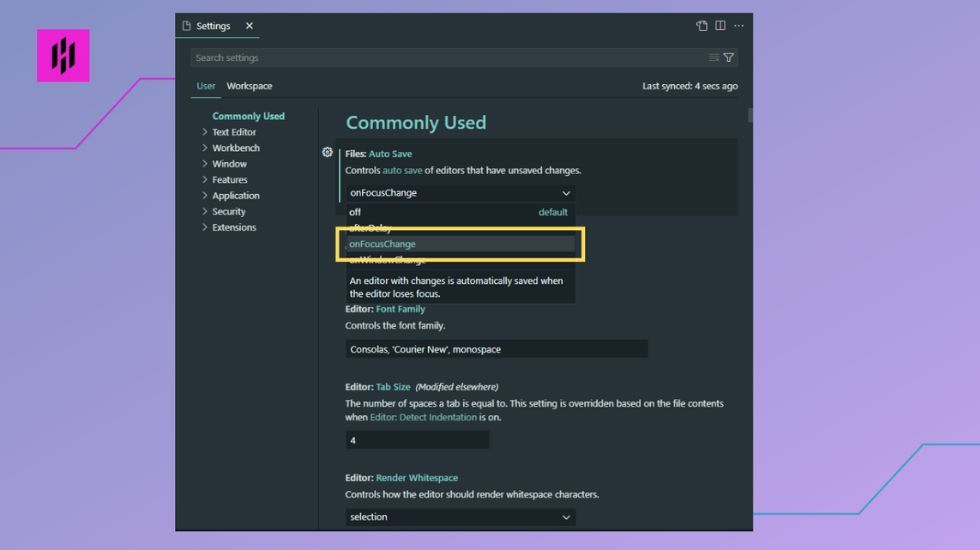
Autosave is a great feature that can help you avoid losing your work if your computer crashes or you lose power. To set up autosave in Visual Studio Code, open the Preferences pane by clicking the File menu in the top of the page and then click preferences, then settings. You can also do this by pressing Ctrl+.
In the settings, change the Auto Save to onFocusChange
Next Step
Congratulations on successfully configuring Visual Studio Code to optimize your web development environment. In this lesson, we learned how to install and utilize the Astro extension for building static websites. We also explored the benefits of integrating Prettier as our default code formatter, enabling us to maintain clean and consistent code.
Now that you have a solid foundation in Visual Studio Code configuration, it's time to put your knowledge into action and create a new Astro project. In the next lesson, we will guide you through the exciting process of starting a new Astro project. Get ready to unleash your creativity and take your web development skills to the next level here, Create Your First Website

