
Web Development Foundations with Astro: A Guide to Layouts, Components, Headers and Footers
Welcome, aspiring web developers, to the exciting world of Astro! In our previous lesson, we set up your Windows 10 or 11 environment for HTML, CSS, and JavaScript web development with Astro. If you haven't had the chance to read that article yet, you can find it right here, Setup Windows for HTML, CSS, Javascript Web Development with Astro. Make sure to give it a thorough read before diving into our new lesson titled "Web Development Foundations with Astro: A Guide to Layouts, Components, Headers and Footers."
Imagine the thrill of bringing your creative visions to life, crafting stunning websites that captivate and engage users. With Astro, you can transcend traditional web development approaches and unlock a new level of flexibility and efficiency. In this comprehensive guide, we'll guide you through the whole process, from setting up the environment to adding essential components like pages, headers, navigation bars, and footers. This project is designed to provide you with a solid understanding of the basics of web development and help you get started on your own web development journey.
Fasten your seatbelt and get ready to learn the foundations of web development with confidence. With the knowledge and skills we'll provide, you'll be well-equipped to create websites that captivate and engage your users. Are you ready to make your web development dreams a reality? Let's get started!
1. Open Visual Studio Code in your Astro project folder
In the previous lesson, we created our Astro project folder where we will put all our codes. The first thing you need to do is open Visual Studio Code and open your Astro project folder.
2. Launch the Development Server
Once you are in the Astro project folder, open the terminal by clicking the terminal menu at the top bar and selecting the new terminal. In the terminal, type the command ‘yarn start’ to launch the development server of your Astro project and watch it come to life by copying the generated local host to your browser.
yarn start
To enhance your workflow, set up your monitor with half the screen dedicated to Visual Studio Code and the other half displaying the browser with your development server. This way, you can witness real-time changes as you make modifications to your code.
With the setup complete, you’re all set to start developing your Astro Project!
3. Creating Metadata
Metadata plays a crucial role in Search Engine Optimization (SEO) as it helps search engines understand the content of a website. The metadata includes information about the website such as the page title, description, keywords, and author, among others. These pieces of information are used by search engines to determine the relevance of a website to a particular search query.
To add metadata to our Astro project, we need to create a data folder and a constants.js file. The data folder will hold the constants.js file, which will contain the metadata information for each page.
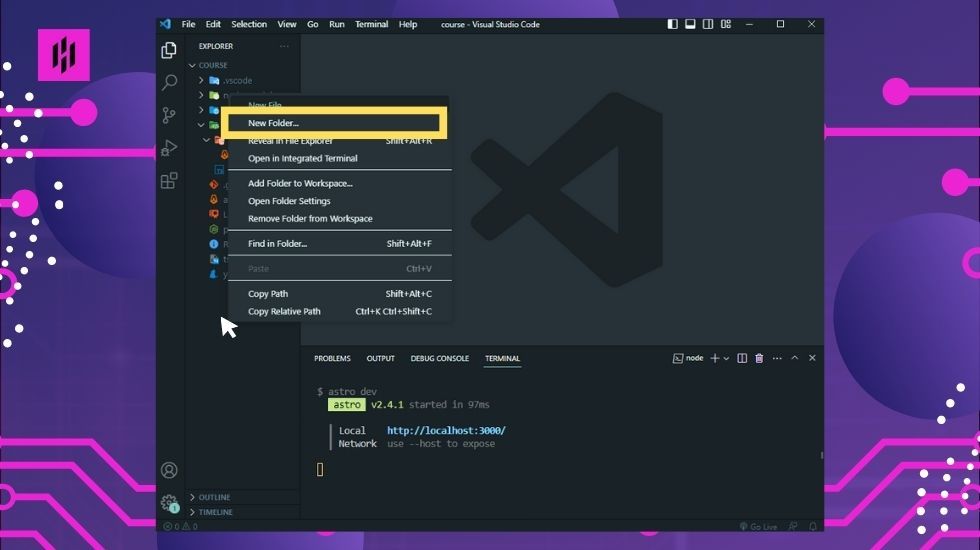
To create the data folder, navigate to the root folder of your Astro project by pointing your mouse to any open space in the explorer section then right click and select ‘New Folder…’
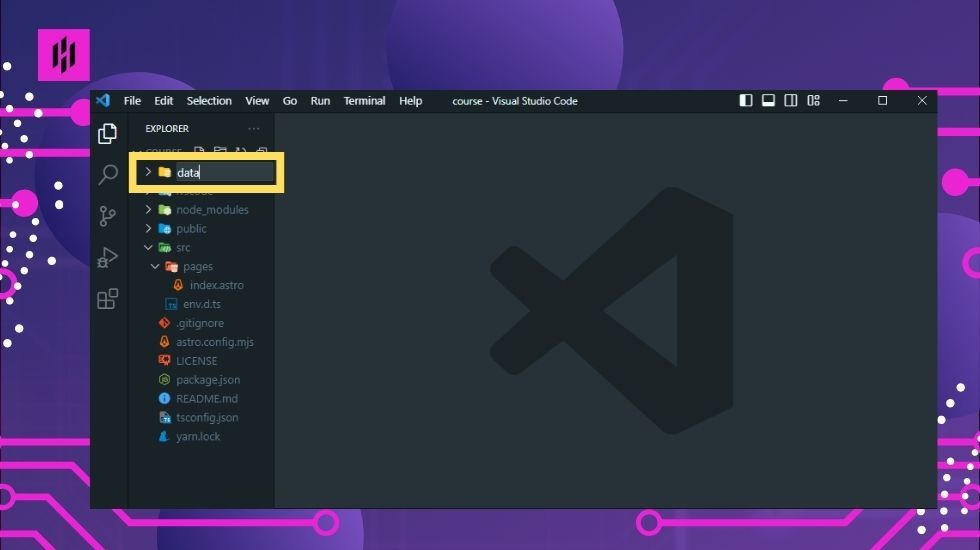
Next, create a new folder called “data”.
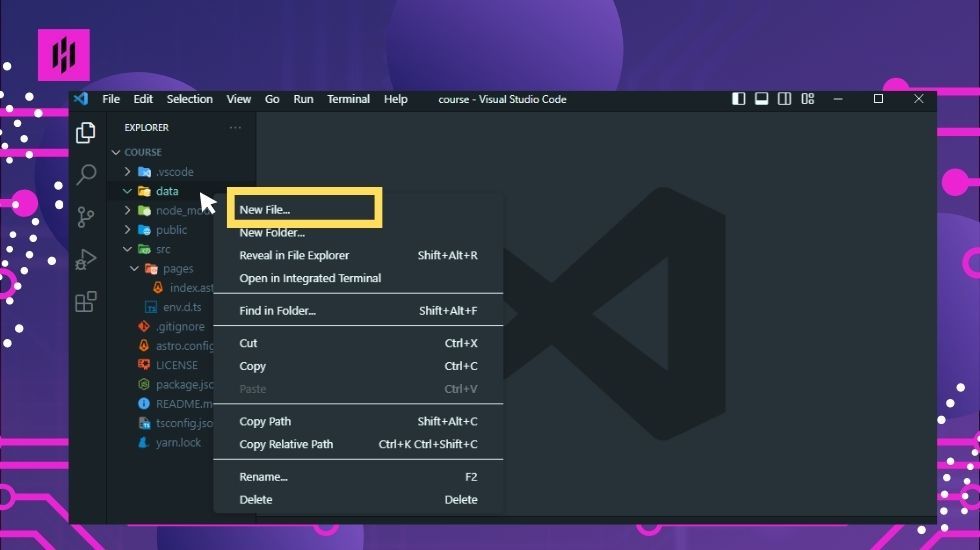
Inside the data folder, create a file called “constants.js” by pointing your mouse in the data folder then right click and select ‘New File…’
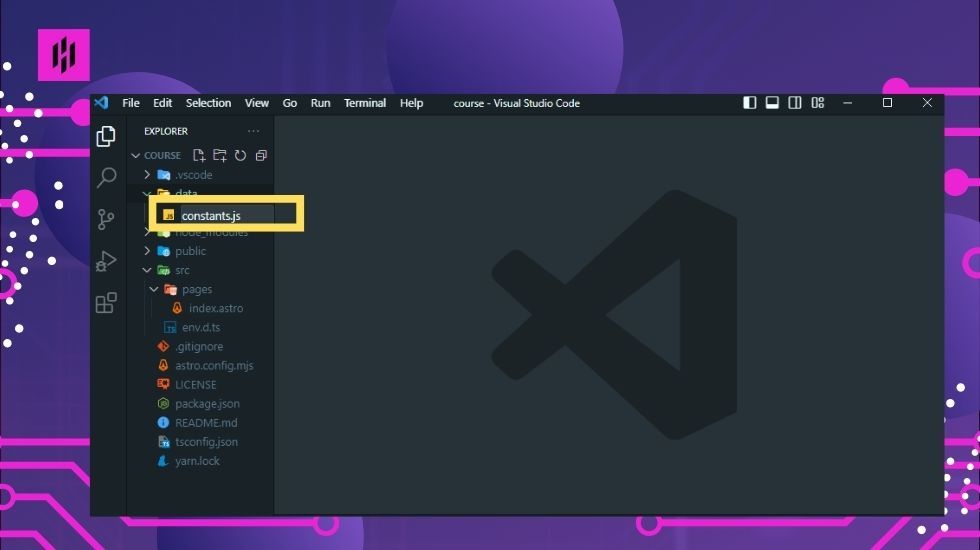
Then type in ‘constants.js’.
In the constants.js file, we will create an object called “pages'' which will hold the metadata information for each page in our project. The “pages” object will have key-value pairs for each page, where the key will be the page name and the value will be an object containing the title, description, and ID of the page.
Here’s an example of how the pages object would look like:
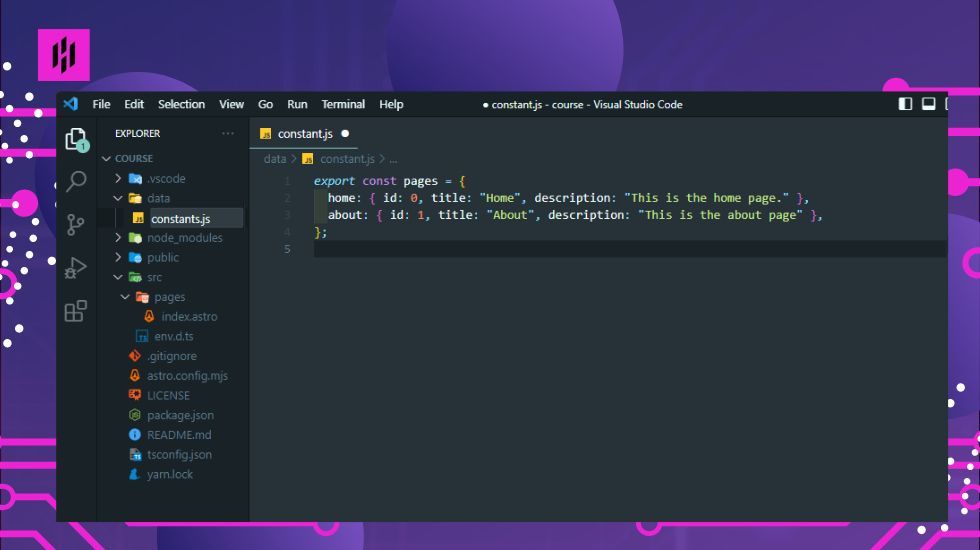
To do this, type the following codes below inside your constants.js file.
export const pages = {
	home: {id: 0, title: "Home", description: "This is the home page."},
	about: {id: 1, title: "About", description: "This is the about page."},
};
In the example above, we have two pages: Home and About. Each page has a unique id, title and a description. These pieces of information will be used in the page’s HTML code to provide metadata to the search engines.
By adding metadata to our Astro project, we are giving search engines more information about our website and its pages. This can help improve our website’s visibility in search engine results and ultimately drive more traffic to our website.
4. Edit the H1
Now that we have our metadata set up, we can now edit the H1 element in our homepage (index.astro) to display the page title dynamically.
In web development, the H1 or the heading 1 tag is one of the most important elements of a webpage as it serves as the main title of the page. It is usually the first thing that users see when they visit your website. That’s why editing the H1 is important as it not only helps you make a good impression to your users, but it also plays a crucial role in search engine optimization (SEO).
When search engines crawl your website, they take into account the content of the H1 tag as it helps them determine the relevance and topic of your webpage. This means that having a properly optimized H1 tag can greatly improve your website’s visibility and ranking on search engine results pages (SERPs).
To edit the H1 in your Astro project, open the index.astro file which will serve as your homepage. Index.astro file is located at the left side bar under the pages folder. Open the index.astro by just clicking on it.
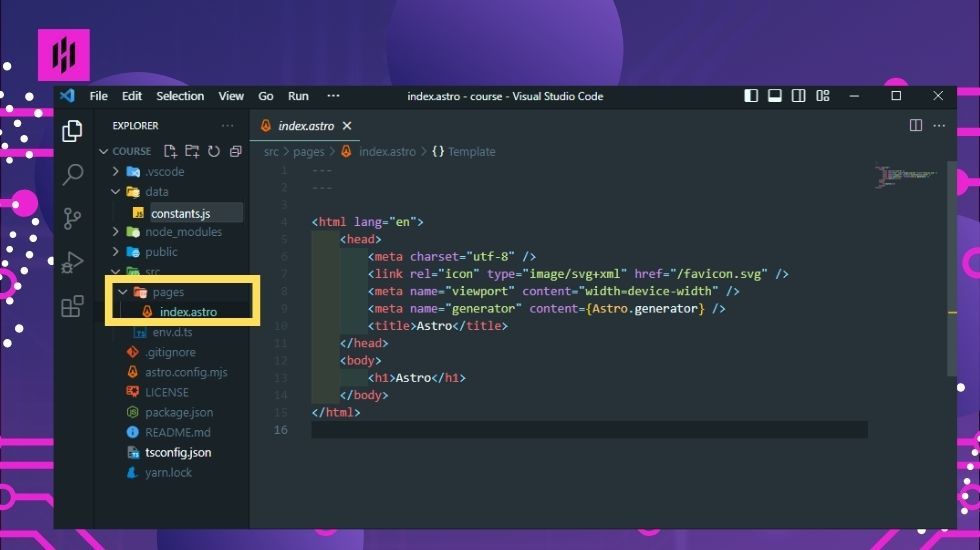
Once you are in the index.astro file, follow the steps below:
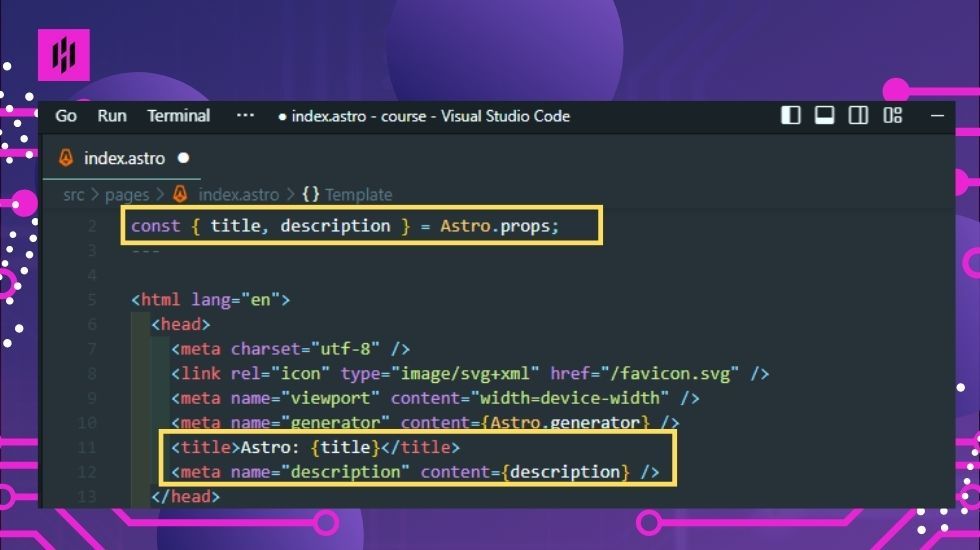
- In the upper part where --- is located, input the codes within the two ---. This code will allow you to access the title and description properties from the constants.js file that we previously created.
const { title, description } = Astro.props;
- Next, we need to modify the HTML codes in the head and body parts of our homepage. First, in the head part, update the title tag by adding the {title} property, which will dynamically update the title based on the page you are on. To do this add the curly braces and the “title” variable to the title element in the head section, like this:
<title>Astro: {title}</title>
- We also need to add a meta description to the head section, like this:
<meta name="description" content={description} />
This meta tag will tell search engines what your page is about.
Here’s the modified head part of the index.astro file would look like:
- Finally, we’ll need to update the body section of our homepage to include a main section, where we can display the page’s title and description using the data from our constants file. Here’s the updated code:
<body>
  <main>
    <h1>{title}</h1>
    <h2>{description}</h2>
  </main>
</body>
This is how our codes would like:

5. Creating the Layout
Now that we have our H1, we can now create a layout. One of the essential aspects of web development is ensuring that your website has a consistent design. Having a consistent design makes your website more professional and easier to navigate. It’s also a way to display common components in a page, like header, menu and footer. To achieve this, we will create a layout file that will hold all the common elements of our website.
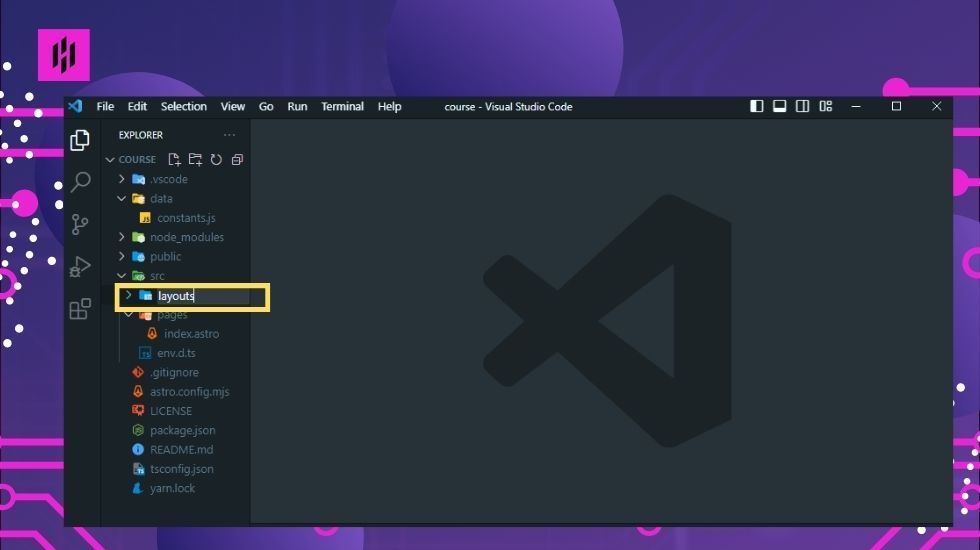
To create the layout folder, navigate to the src folder of your Astro project by pointing your mouse to the src folder then right click and select ‘New Folder…’
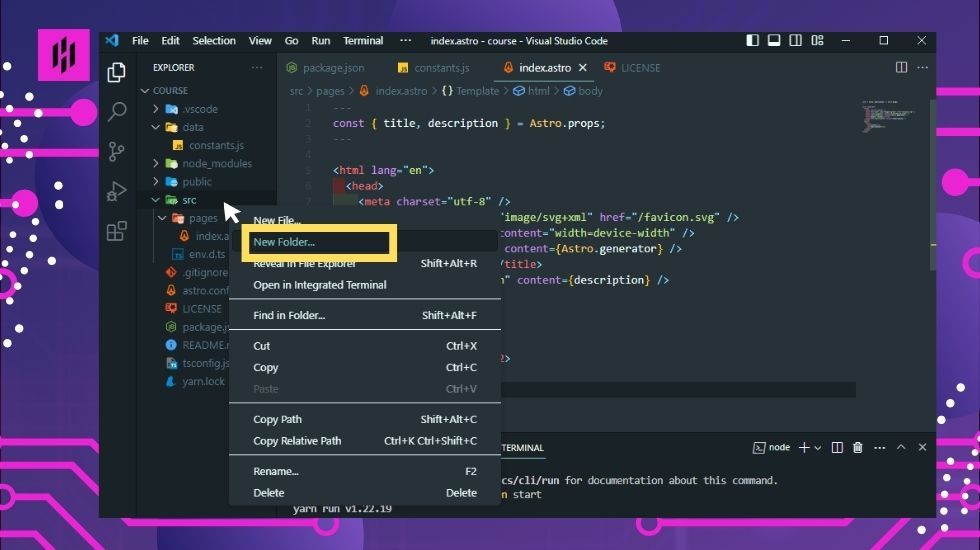
Then, create a new folder called “layouts”.
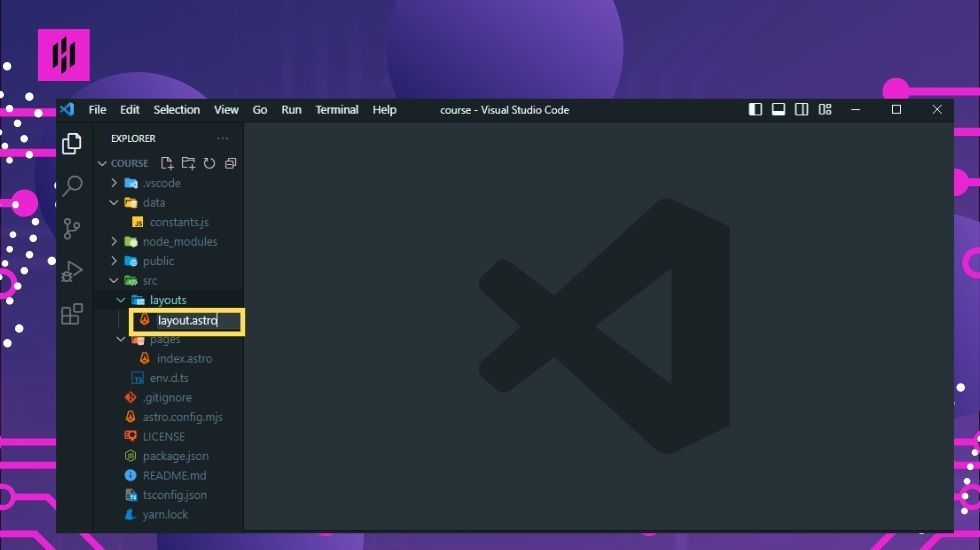
Inside the layouts folder, create a file called “layout.astro” by pointing your mouse in the layout folder then right click and select ‘New File…’
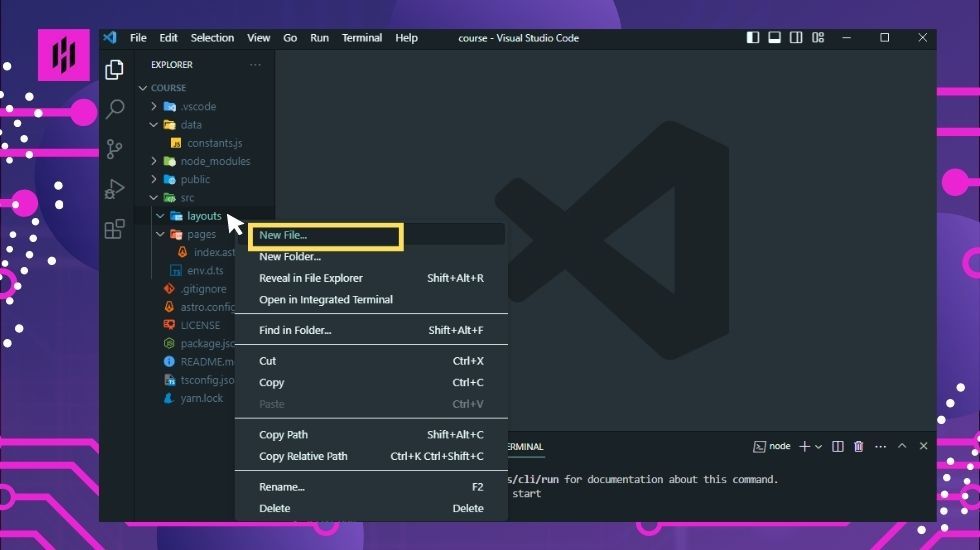
Then type in ‘layout.astro’.
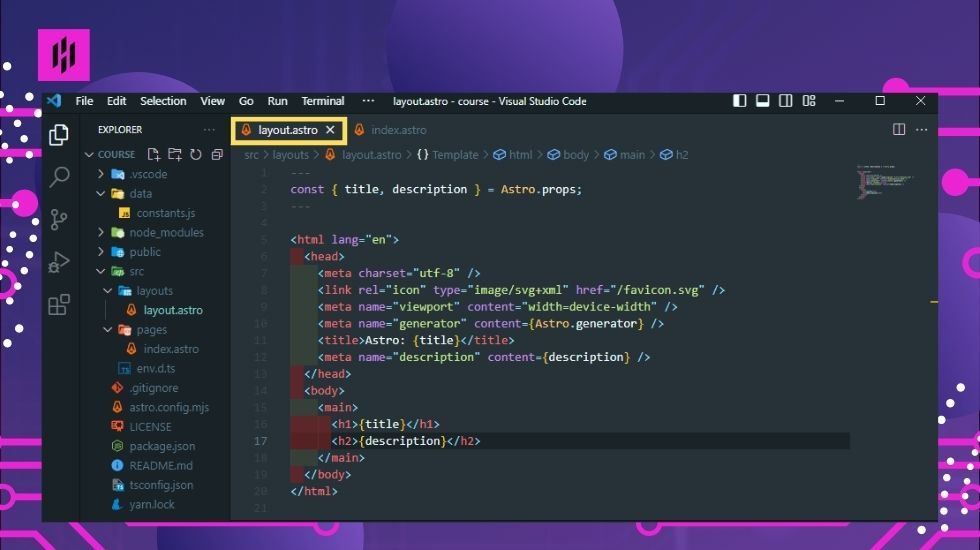
Once layout.astro is created, we will copy and paste the updated codes from the index.astro file into the layout.astro file.
By creating a layout file, we can reduce code duplication and make our website more maintainable. If we need to make any changes to the layout, we can do it in one place, and the changes will apply to all pages that use the layout file.
Now that we have our layout file, let’s move on to updating our pages to use the layout.
6. Updating the index.astro and Copying it to the about page
The next step is to update the index.astro file to use the layout. To do this, we need to replace all the codes we have in the index.astro file..
First, we need to import the Layout component by adding this code on the upper part where this two –- are located:
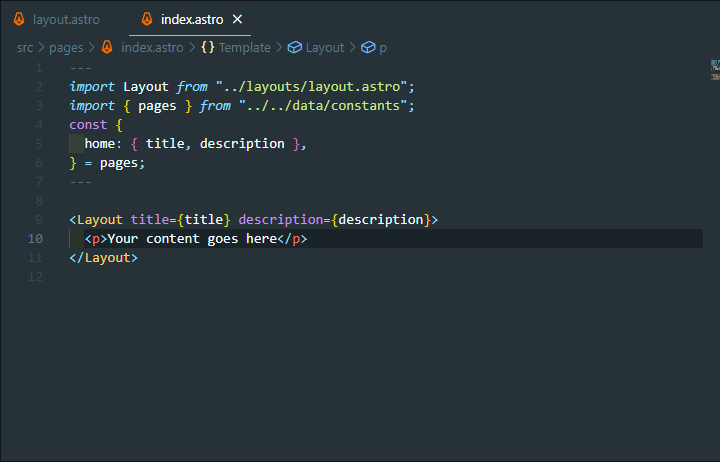
import Layout from "../layouts/layout.astro";
import { pages } from "../../data/constants";
const {
  home: { title, description },
} = pages;
The first line imports the Layout component from the layout folder. The second line imports the pages constant object from the constants.js file, which we created earlier. The third line uses object destructuring to extract the title and description properties from the home object in the pages object.
Next, we need to wrap the content of the index.astro file with the Layout component. To use the layout file in our pages, we need to add a special tag in each page’s code. This tag is called the “slot” tag and will tell Astro where to inject the page-specific content. To do this, we need to add the following code:
<Layout title={title} description={description}>
     <p>Your content goes here</p>
</Layout>
This code passes the title and description variables to the Layout component as props.
This is how our codes would look like in the index.astro:
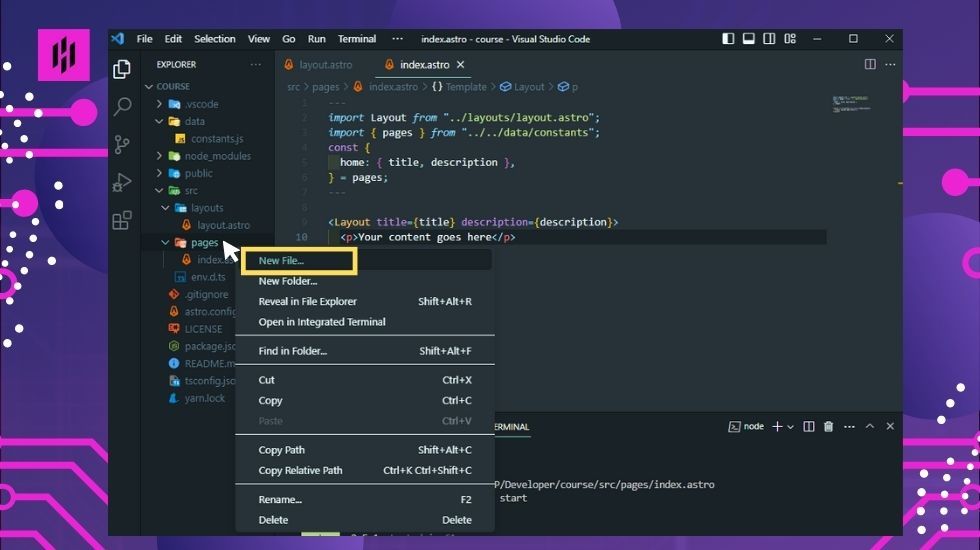
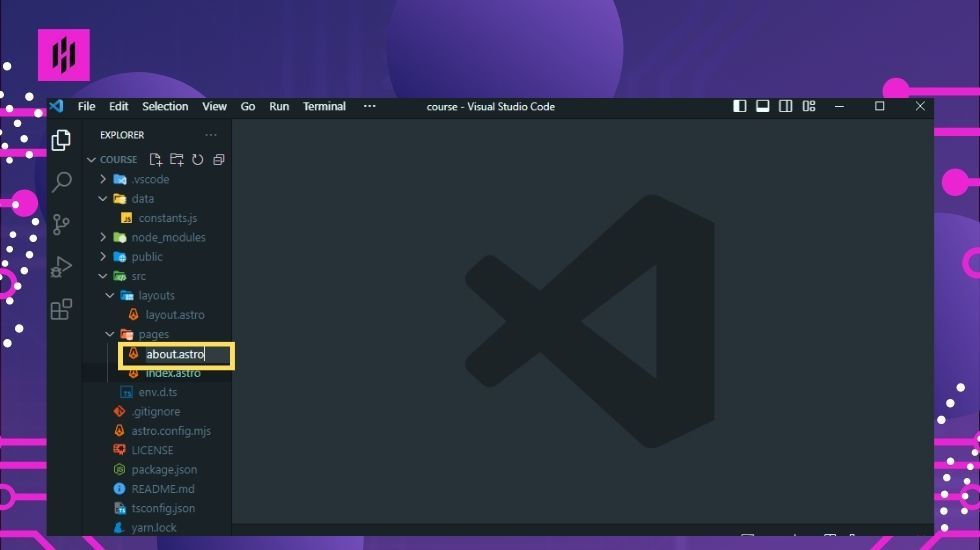
Now that the index.astro file is using the layout, we can copy its contents to create the about.astro file. To create the about.astro file, we need to create a new file in the pages folder called “about.astro”. To do this, point the mouse in the pages folder and select ‘New File…’
then type ‘about.astro’
Next, copy the contents of the index.astro file into the about.astro file and replace the text home to about.
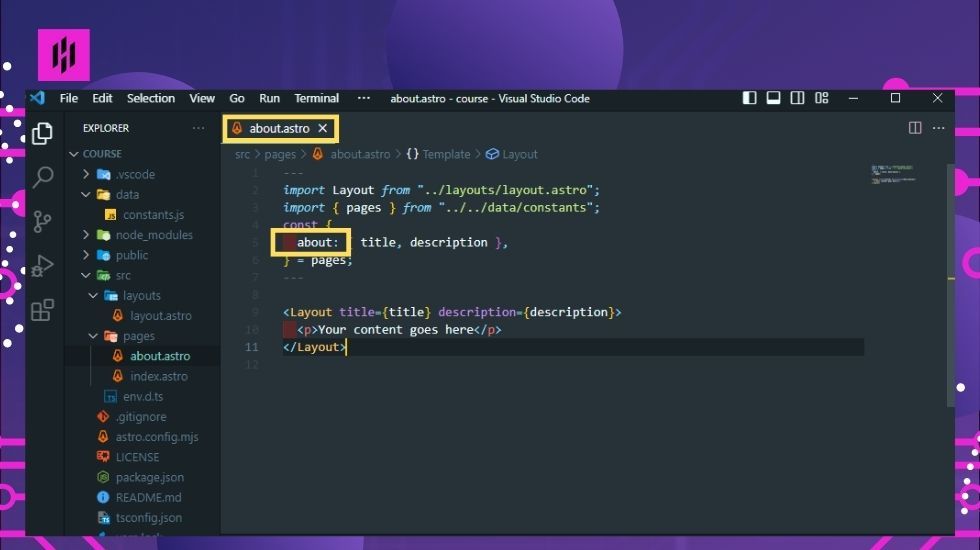
With these changes, your Astro app now has a layout that is used by the index page and an about page that uses the same layout.
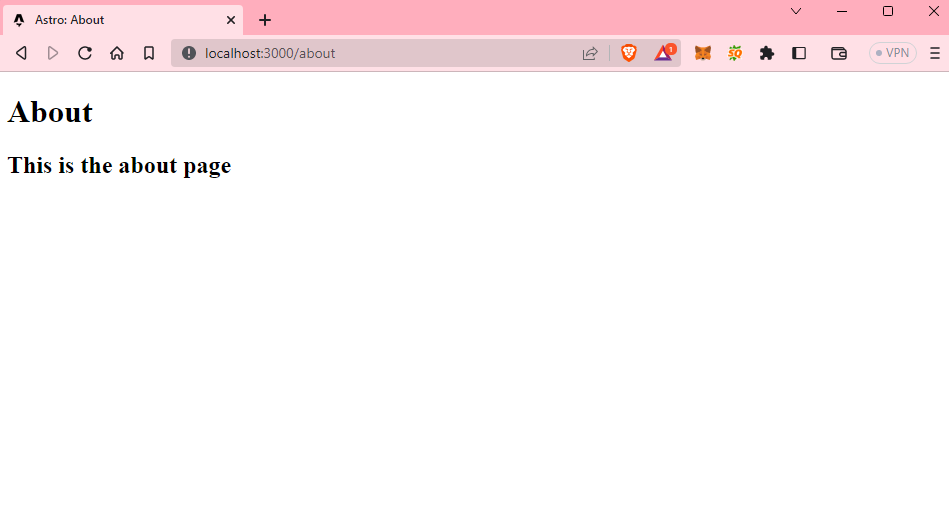
This is the output of the homepage and the about page that you will see in your browser:
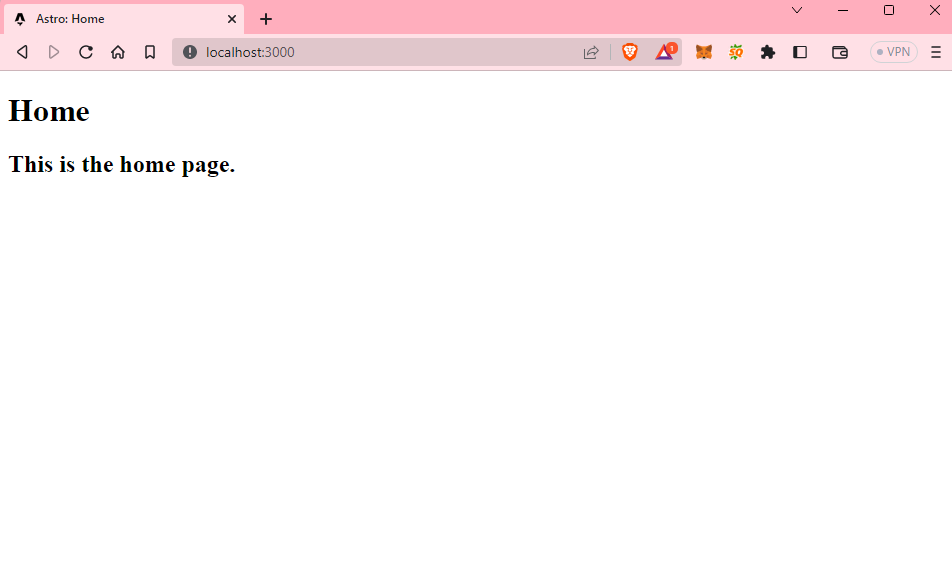
To go to the about page, just add ‘/about’ in your url.
7. Adding the Header with Navbar
Now that we have the pages ready, we are ready to add the header with a navbar. It is an important step to create a well-designed and user-friendly website. A header helps to establish the identity of a website and provides easy access to various pages through a navbar. In this section, we will discuss how to add a header with a navbar to your Astro website.
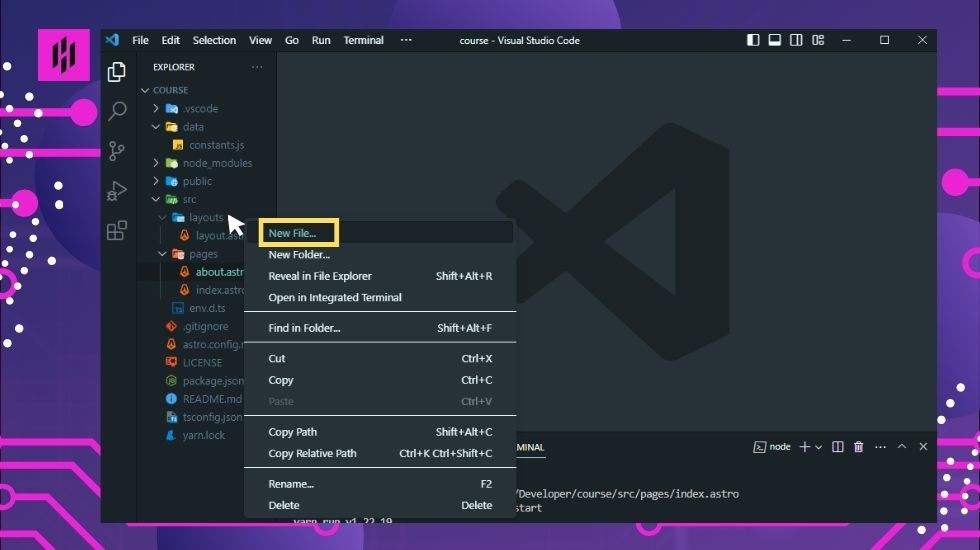
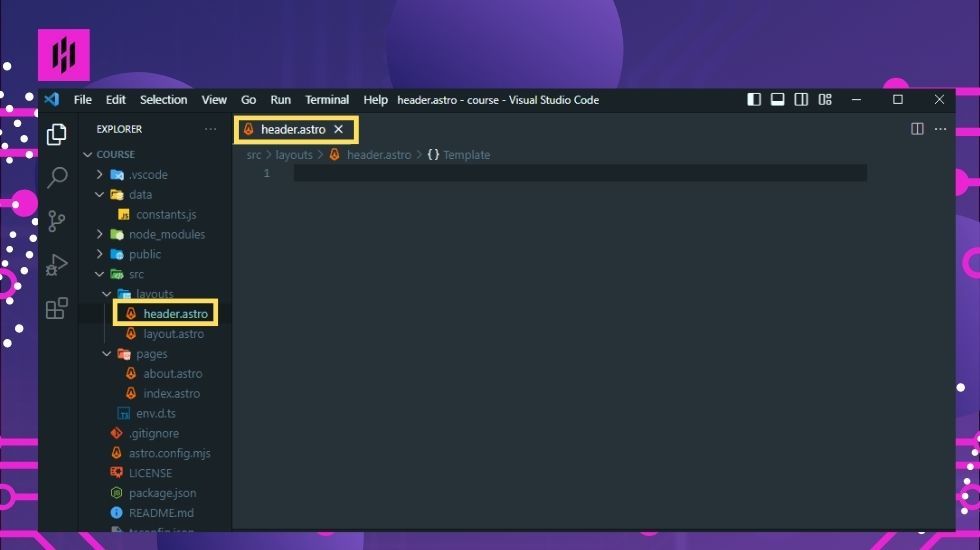
To add a header, create a new file in the layouts folder named ‘header.astro’
Add the following code to the header.astro file:
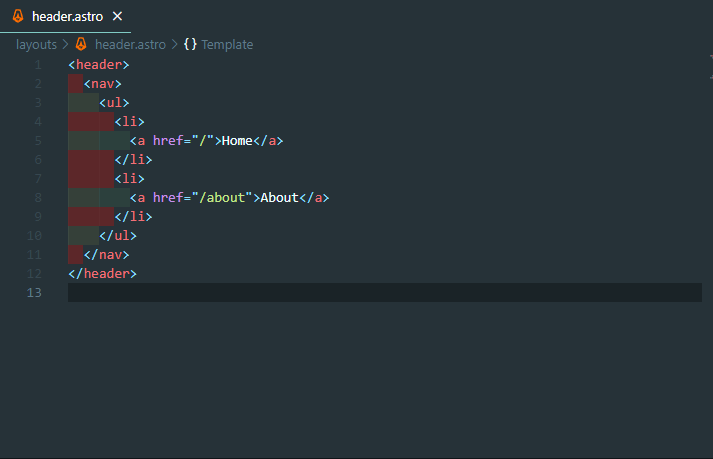
<header>
  <nav>
    <ul>
      <li>
        <a href="/">Home</a>
      </li>
      <li>
        <a href="/about">About</a>
      </li>
    </ul>
  </nav>
</header>
In this code, we have created a header element and added a nav element inside it. Inside the nav element, we have added an unordered list with two list items representing the links to the home and about pages.
This is how it looks like in the header.astro file:
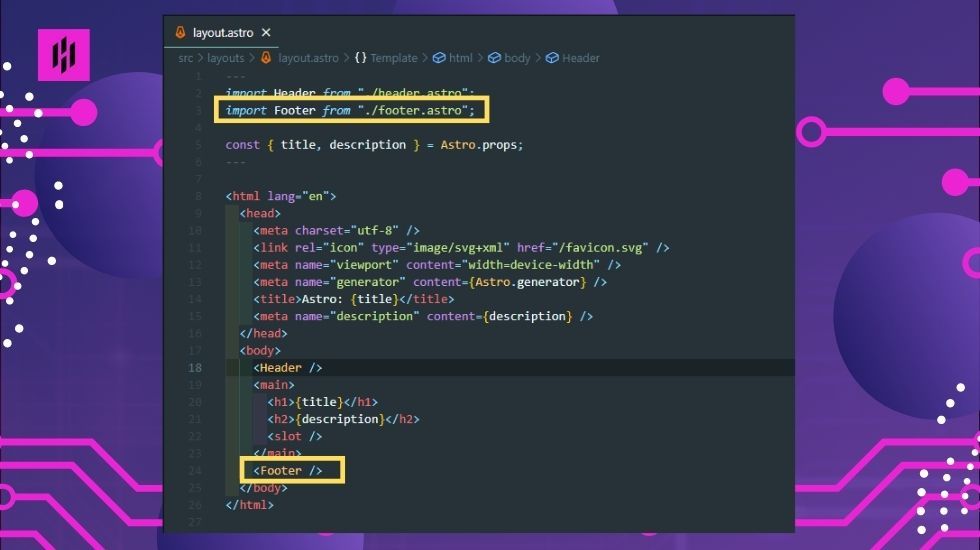
Next, in the layout.astro file, import the ‘Header’ component by adding the following code to the top of the file, within the lines –-:
import Header from "./header.astro";
And add the <Header /> component in the ‘body’ section.
This is how it would look like:

By adding the ‘Header’ component, you will now have a consistent header and navigation bar across all your pages, which can improve user experience and website design.
8. Adding the Footer
Lastly, we are now ready to add the Footer. The footer is an important element in a website that appears at the bottom of every page. It provides important information such as copyright notices, legal disclaimers, contact information, and links to other relevant pages. In this step, we will add a footer to our website and make it complete.
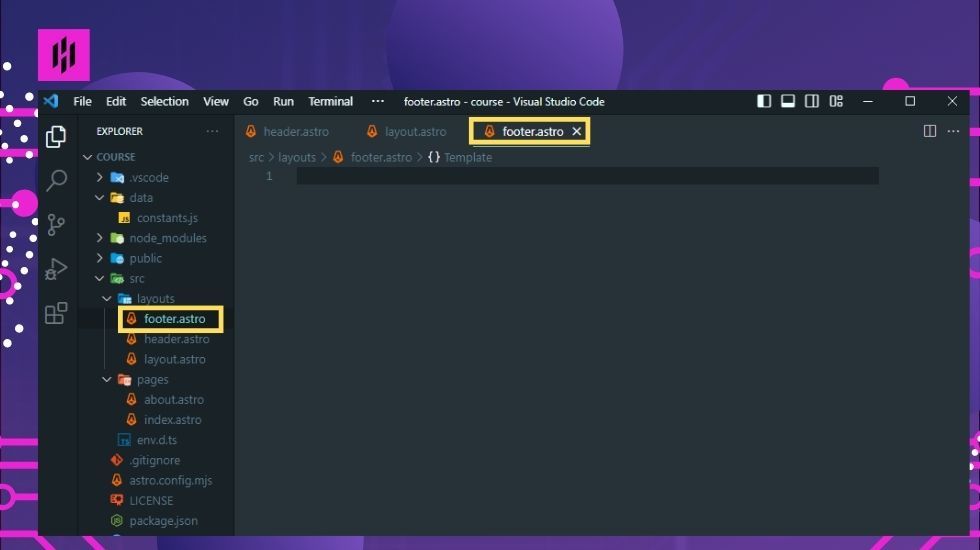
To add a footer, we will create a new file named footer.astro inside the layouts folder.
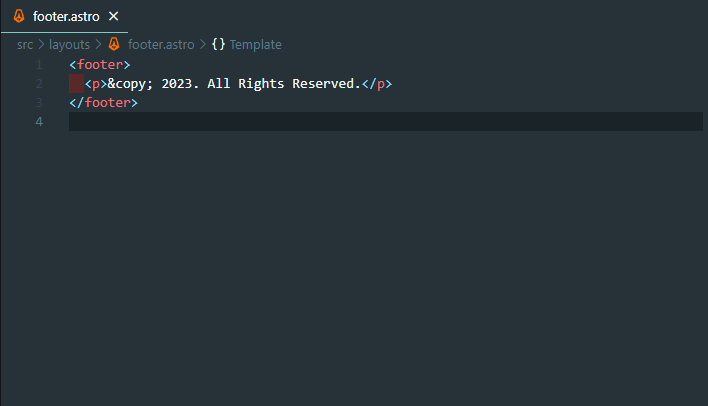
Inside the footer.astro file, we will add the following code:
<footer> <p>© 2023. All Rights Reserved.</p> </footer>
This code creates a simple footer element that contains a copyright notice and the current year.
This is how it would look like in the footer.astro file.
Next, we will import this footer component into our layout.astro file by adding the following code on the top, under the header:
import Footer from "./footer.astro";
We can then add the footer component at the bottom of our layout by including the following code within the main element:
<Footer />
This is how it would look like in the layout.astro file.
With this, we have added a footer to our website, providing important information to our users and completing the design of our website.
Exercise: Adding a Contact Page
Now is your turn to add a contact page. In this exercise, you need to create a contact page for our website. A contact page is important because it allows visitors to easily get in touch with you. Here are some few tips to finish this exercise:
- Create new file called “contact.astro” inside the pages folder
- Add the contents from index.astro or about.astro and replace some of the code with contact
- Add the meta data in the constants.js file
- Add the contact page to the header
Once you’ve successfully added your contact page, upload it to our discord channel developer in this link https://discord.com/invite/daEPHqwA8d to show off what you’ve done.
Conclusion
Congratulations! You have successfully taken the first step towards becoming a successful web developer with Astro! By following this guide, we have explored the foundational elements of web development and provided you with a comprehensive understanding of layouts, components, headers, and footers. We hope that this guide has given you the knowledge and confidence to start creating your own web projects with Astro.
Stay tuned for our next article where we will dive deeper into more advanced features of Astro and how to further optimize your website for the best performance. Happy coding!